Have you ever needed to refund part or all of a booking? Well the credit notes feature allows you to do just that.
Here's how you can get this done.
Credit notes can be created in 2 places:
Within your Stripe account
Within your Webready Invoice
Creating a credit note in Webready is not synced to Stripe, so this is best for cases where you are manually handling a refund that does not need to be reflected Stripe.
Creating a credit note in Stripe
Once you have a successful payment made in Webready, it is possible to complete the refund in Stripe.
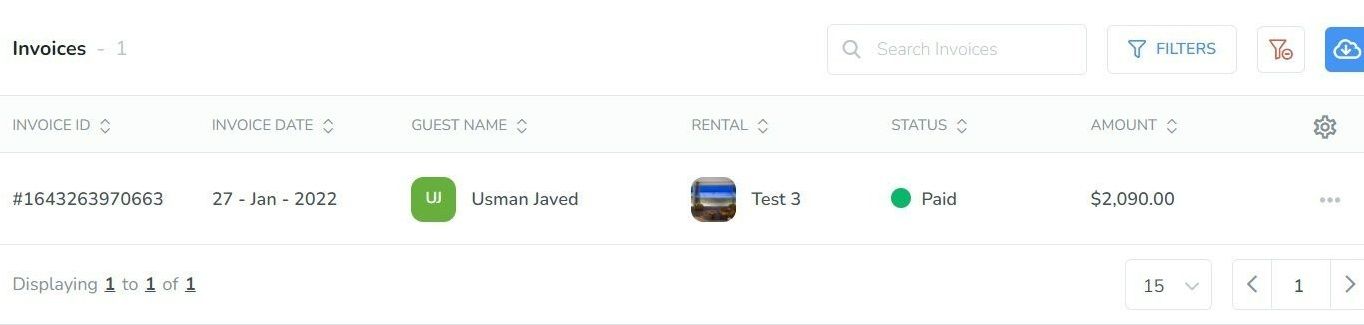
Here, you can see a paid invoice in your Webready account:
To create a credit note from Stripe:
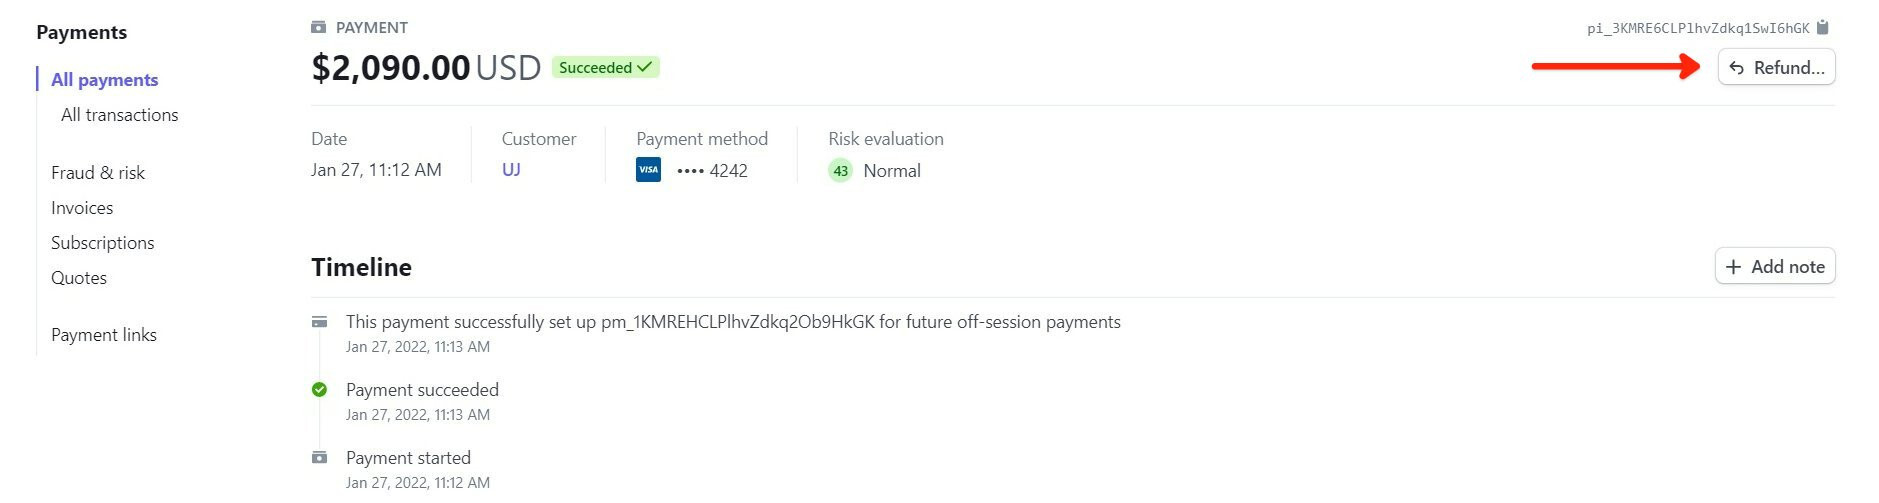
First, log into Stripe and navigate to the Payments section and click on the payment that you will like to issue a refund for.
Click the "Refund" button in the top right.
Enter the amount that you will like to refund and enter a reason.
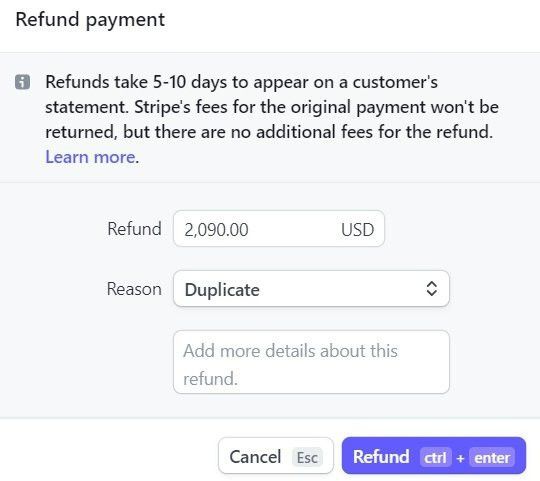
Click the "Refund" button.
You will now see that the payment in Stripe is updated to show the refund details.

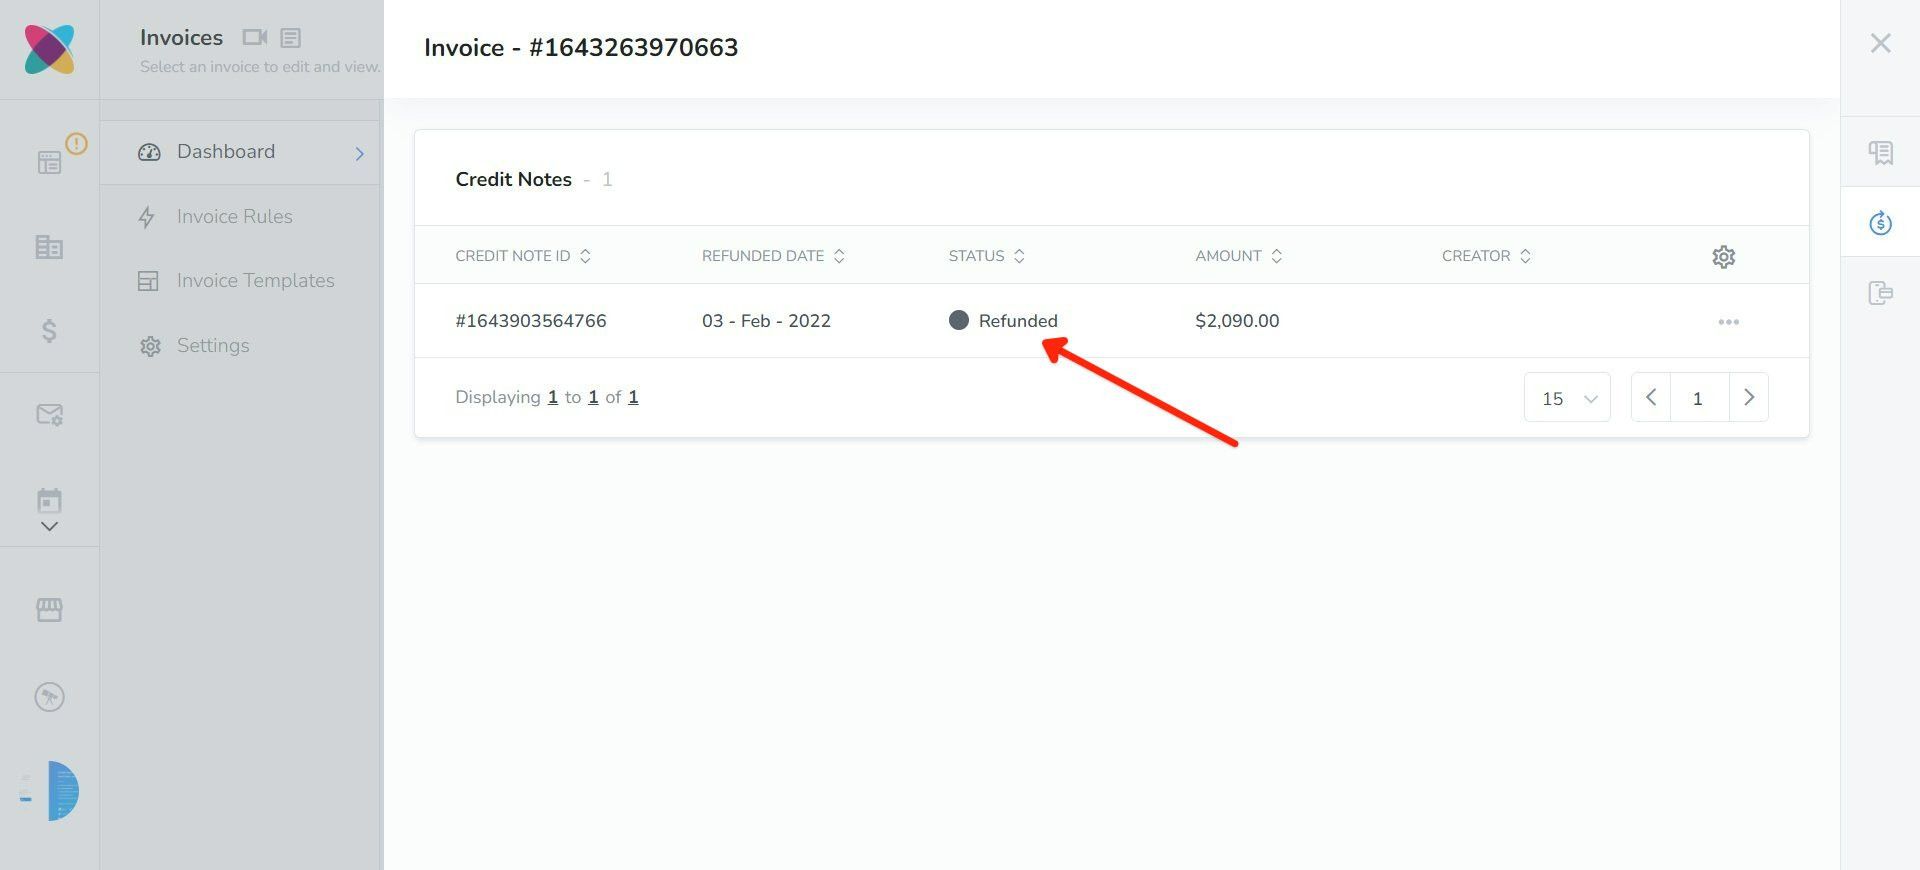
You can view your credit note in Webready by clicking on the invoice then on the credit note tab on the right. You will see that the status has been updated to "Refunded".
Creating a credit note in Webready
On the left navigation bar, select Invoices.
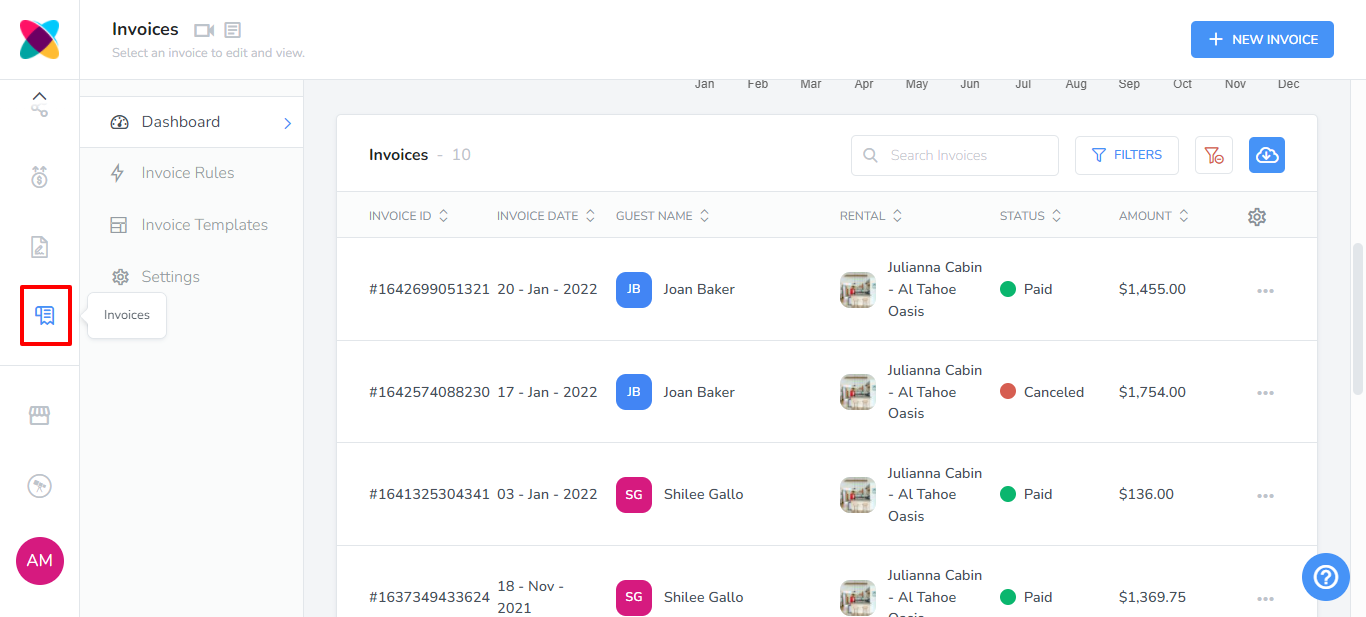
Scroll down on the Dashboard page, locate and click on the invoice where you would like to add a credit note
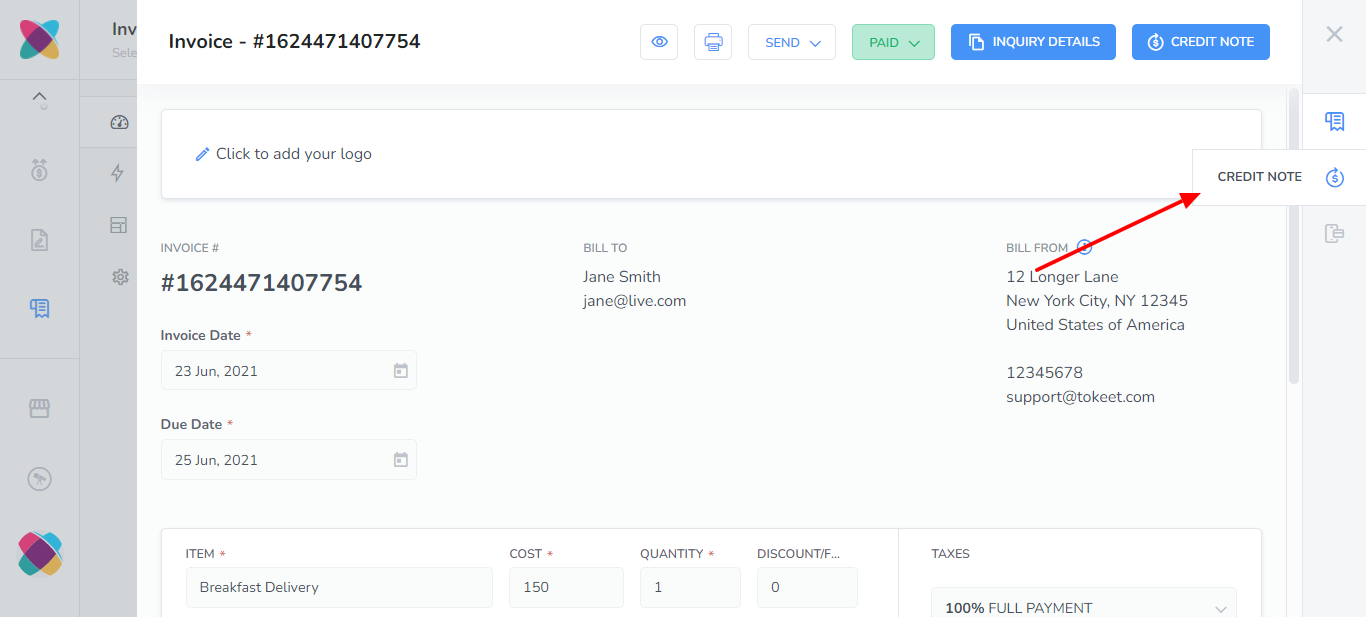
Note: In Webready, credit notes can only be created for Paid invoices.Click on the "Credit Note" button.

Adjust the credit note if necessary. For instance, you may change the percentage of the invoice total that should be refunded.

Click "Save".
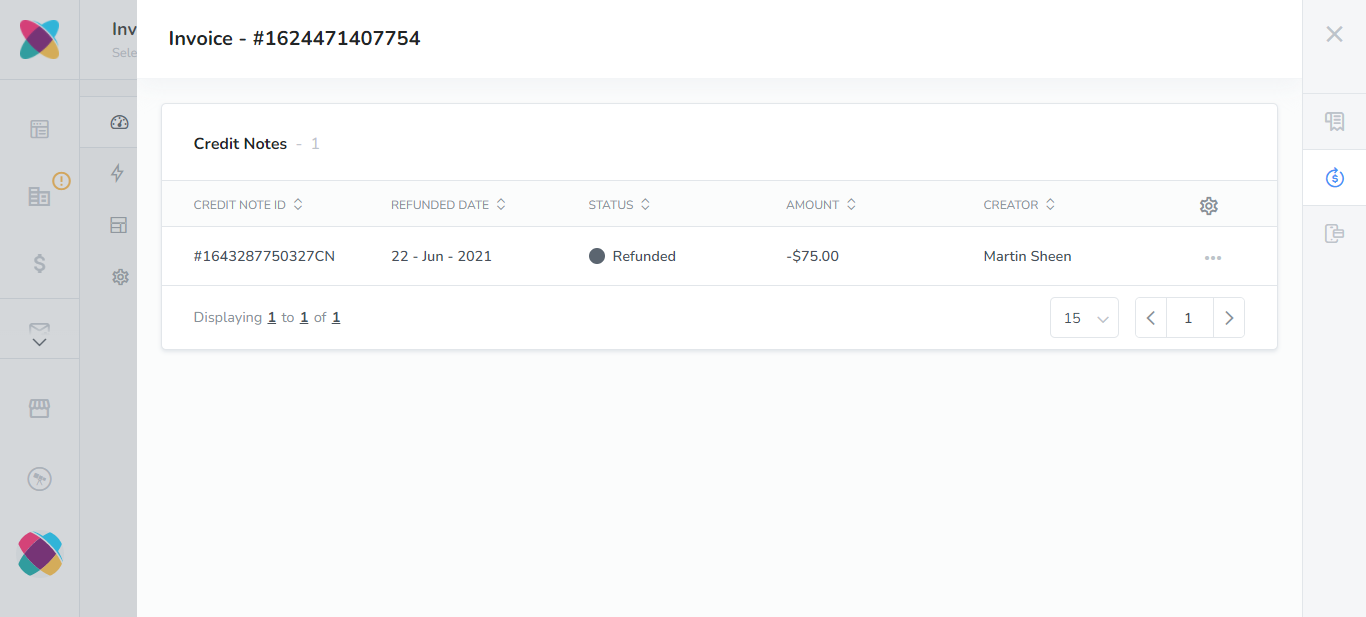
Click on the "Credit Note" tab of the invoice.
You will see the credit notes relating to this invoice here
That's it!