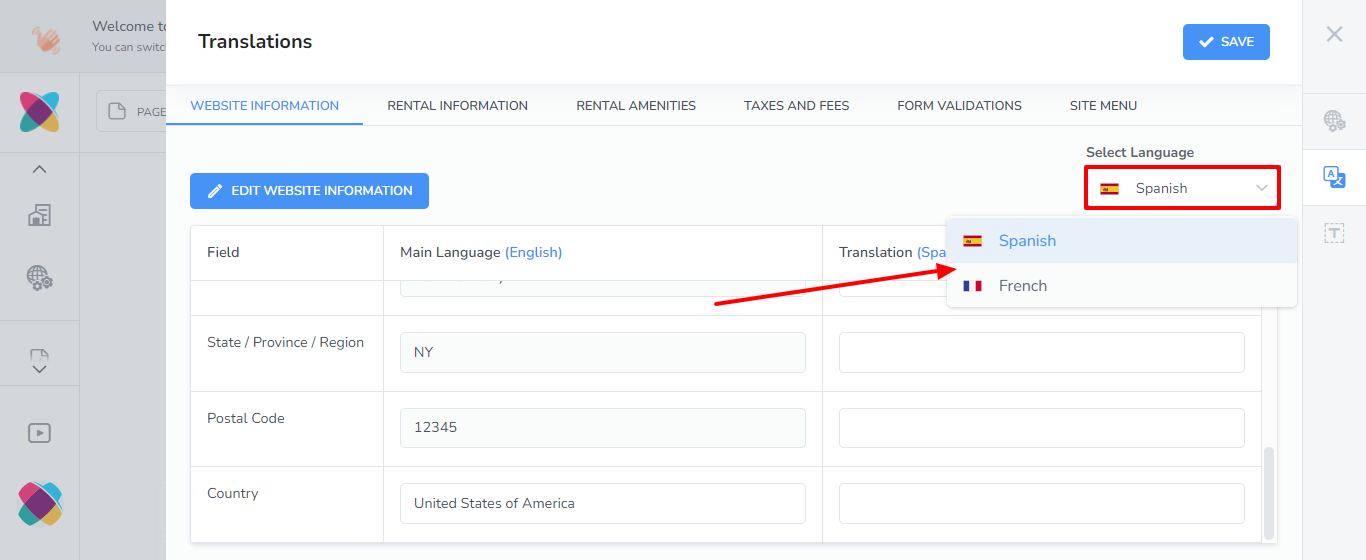
The Webready Translator Translations section allows you to select each additional language and enter the equivalent text (translation) in that language to replace the main language values. The areas that you will be able to translate are:
> Website Information
> Rental Information
> Rental Amenities
> Taxes and Fees
> Form Validations
> Site Menu
Once the trial ends, if multi-language is still enabled on your published website, we will auto subscribe the website to the Website Translator add-on.
If you want to avoid auto subscribing, please turn off multi-language on your published website before the trial end date.
Adding Translations
Navigate to Language Settings.
To access the Webready Translator feature, open the Webready Editor, scroll through the left pane and click on the Language Settings icon:
Click on the Translations tab on the left.

Select the additional language that you will like to enter translations for.

Each tab will display a list of fields with your main language values and allow you to enter the translated values.
Some tabs will also include an "Edit" button where you can modify the original field values in your main language.
Enter the translation for each field.
Click Save.