The Booking Form Settings allow you to customize the look and feel of the booking process once you have enabled bookings for your website.
To get direct bookings for your Webready website, you must first subscribe to the Booking Engine app from the App Store.
The Booking Form Settings can be found on the Booking page in the Website Editor.
Below, we'll explain the different options available in the Style tab of the Booking Form settings.
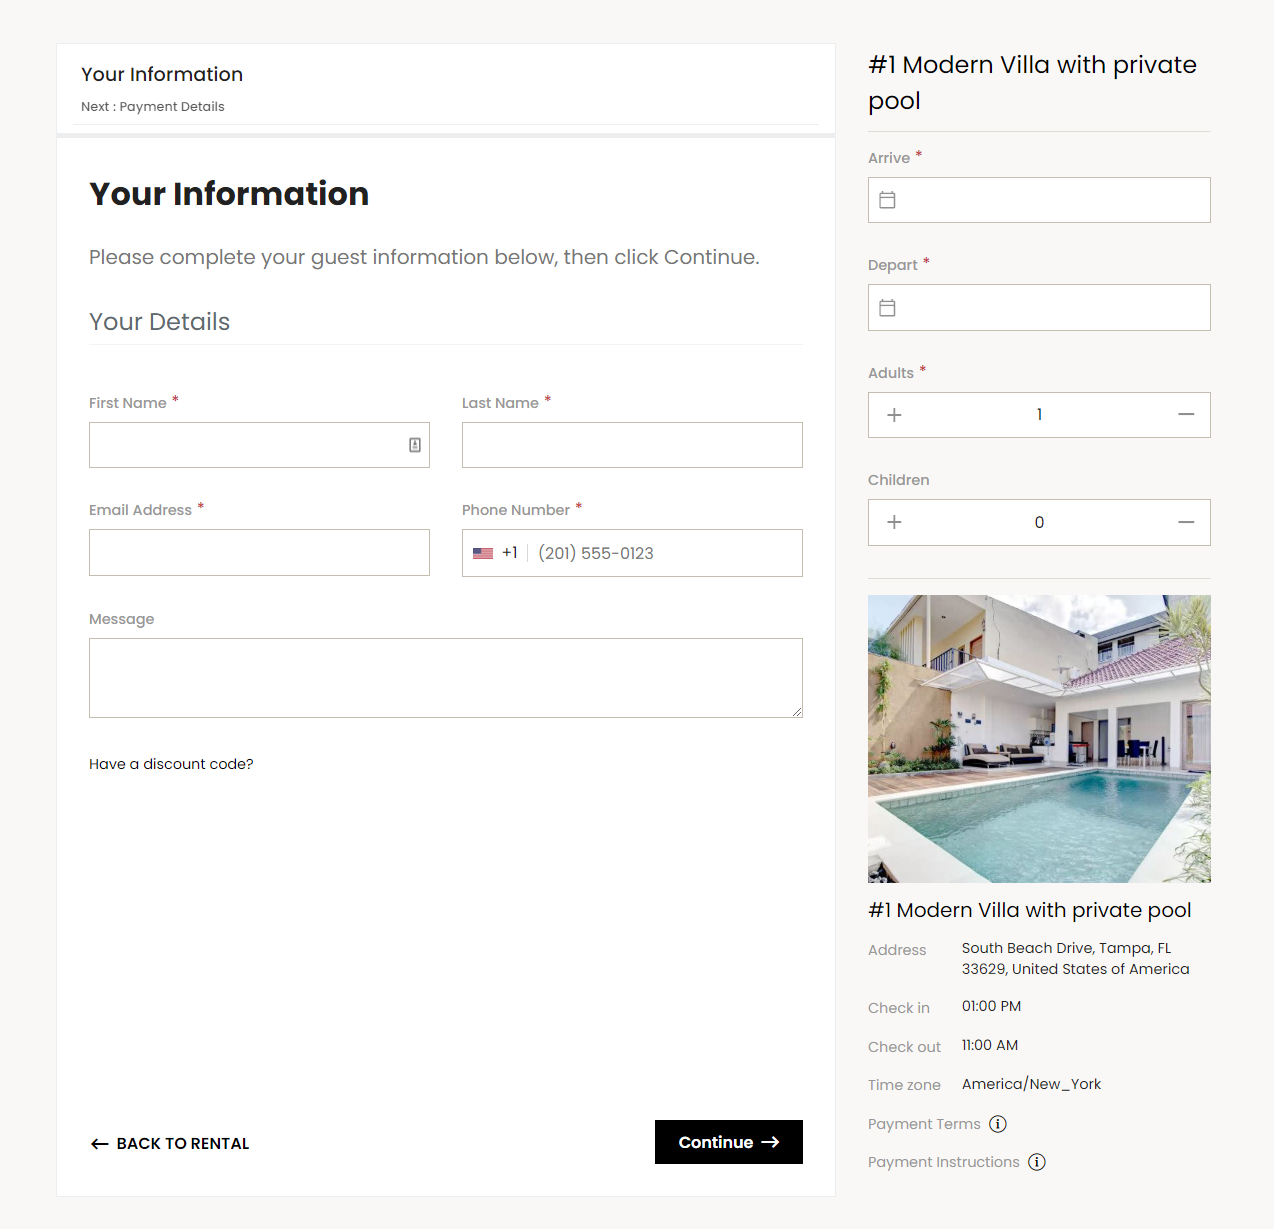
The Style Tab allows you to control the overall look of the booking form labels, input fields and buttons. This includes the style, colors and placement of these items on the form.
Customization can be done as follows:
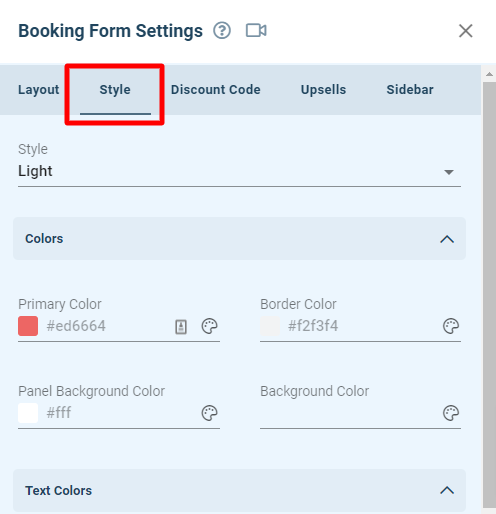
Style
The Style option lets you pick which look to assign to the booking form.
There are 3 styles to choose from: Default, Light and Contrast.
Default:

The Default style does not make use of the primary color, with the sidebar area having the same background color as the surrounding booking form.
Light:

The Light style uses the primary color in various places, with a light background color for the sidebar area.

Contrast:
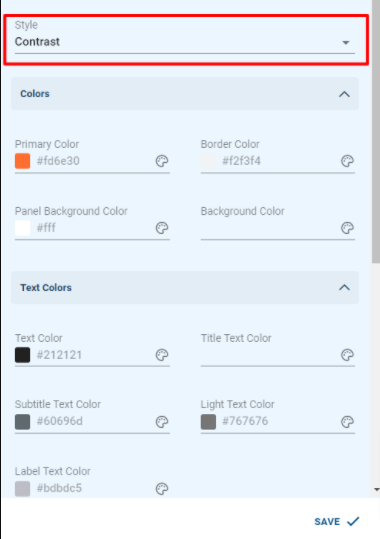
The Contrast style uses the primary color in various places, with the sidebar area having the same background color as the surrounding booking form.

The Style tab is divided into 4 sections:
Colors
Text Colors
Tab Bar Colors
Sidebar Colors
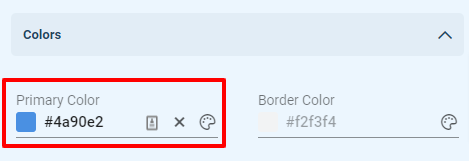
Colors:

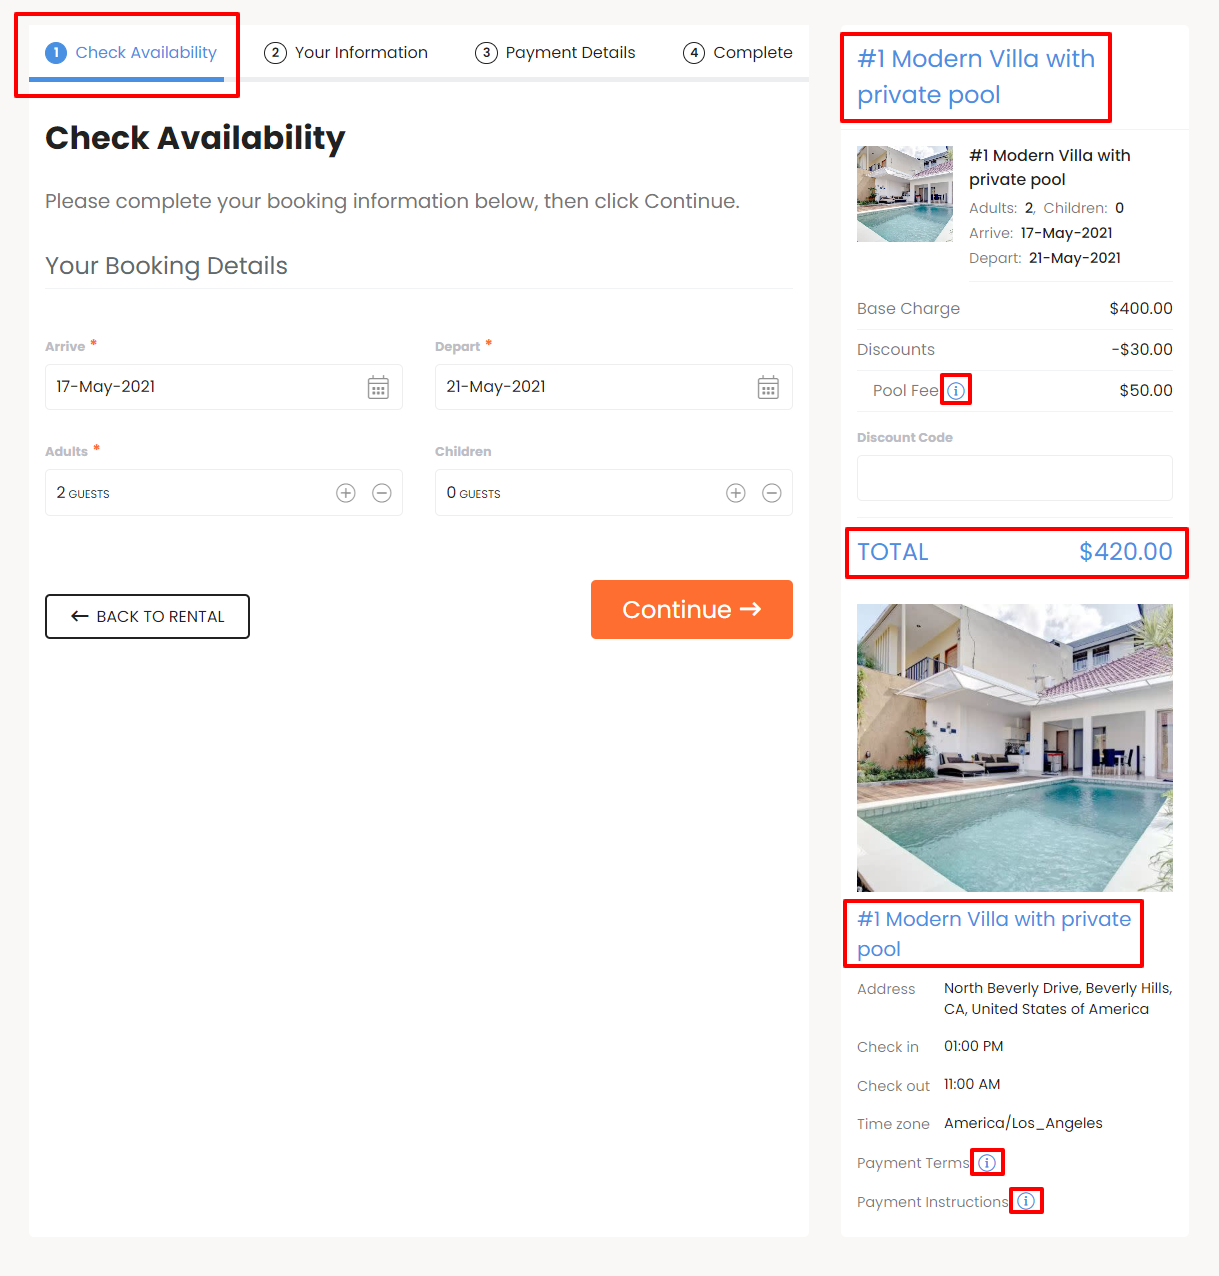
Primary Color - Adjust various areas like the sidebar title, rental info title, icon and link colors. For the Default style, this will also adjust the navigation button color for the steps.
Selected primary color as applied to the Light style:
Border Color - Adjust the color of the line borders in the steps (under the subtitle) and in the sidebar.

Selected border color as applied to the Light style:

Panel Background Color - Adjust the background of the steps & payment pop-up windows, as well as the sidebar for the Contrast style.
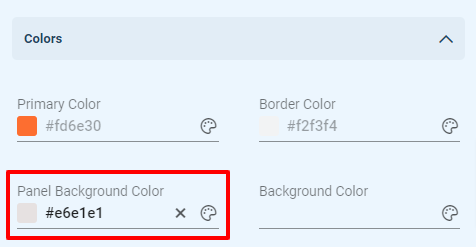
Selected panel background color as applied to the Light style:

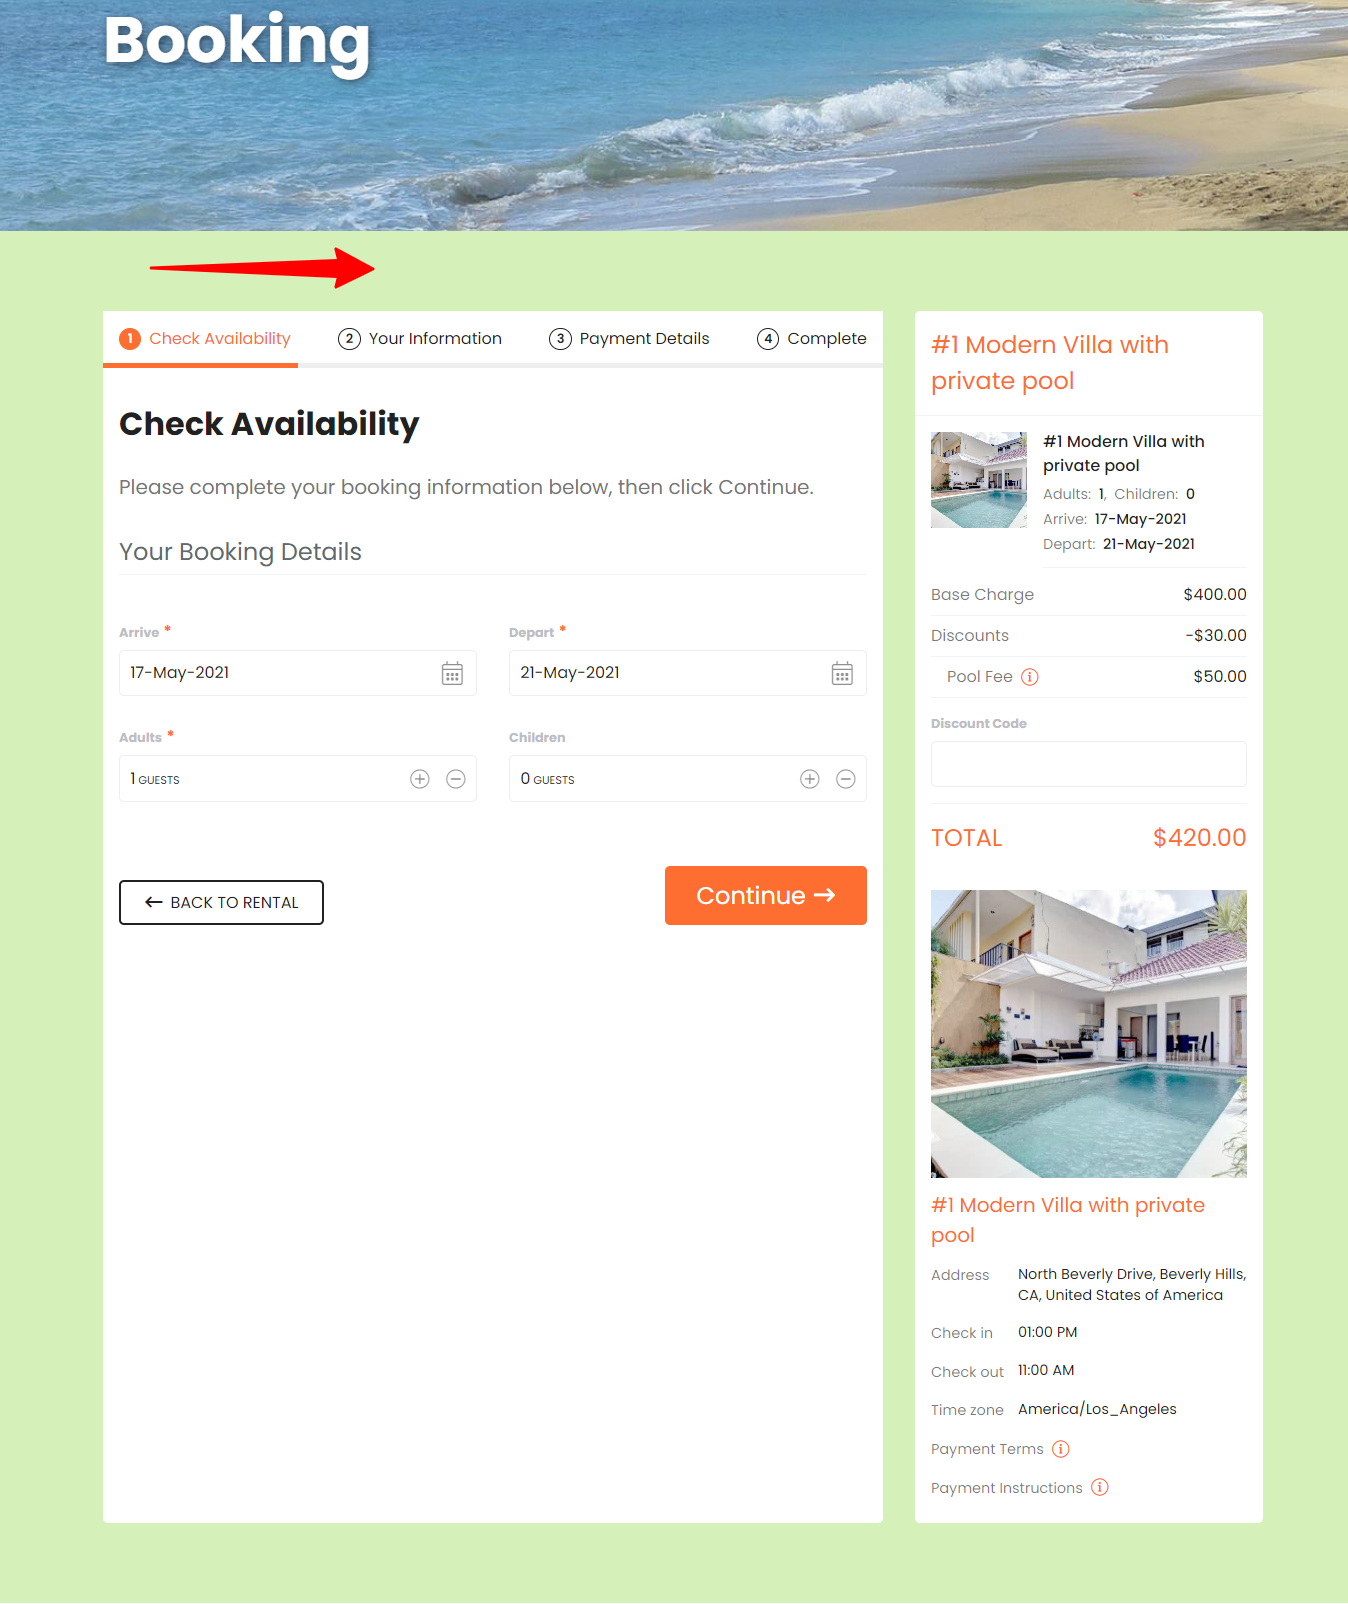
Background Color - Adjust the booking page background color which is behind the booking form.
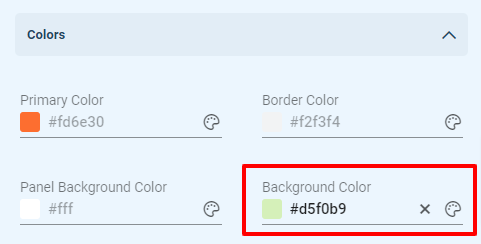
Selected panel background color as applied to the Light style:
Text Colors:
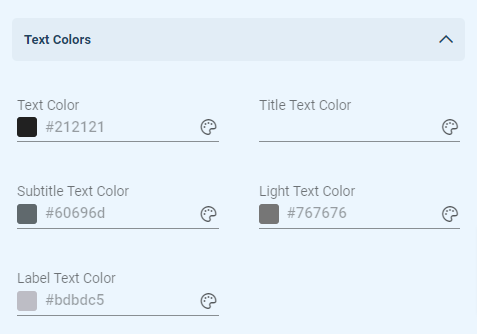
Text Color - Adjust the text color on the steps, titles, and guest input values on the Complete step, along with titles and some labels for Upsells.
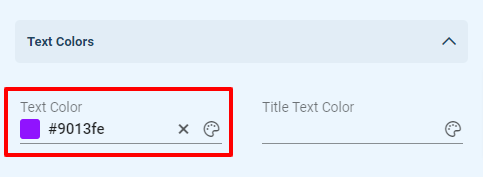
Selected text color as applied to the Light style with some areas highlighted:

Title Text Color - Adjust the title color on the steps, along with titles and some labels for Upsells, such as button and cost text.

Selected title text color as applied to the Light style with some areas highlighted:

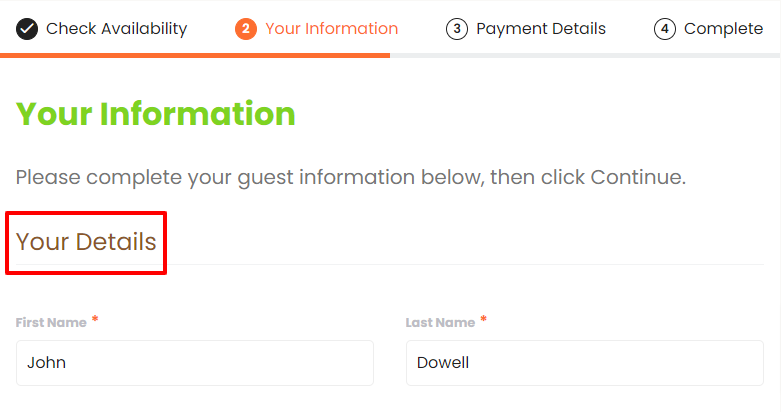
Subtitle Text Color - Adjust the subtitle text color in the steps.
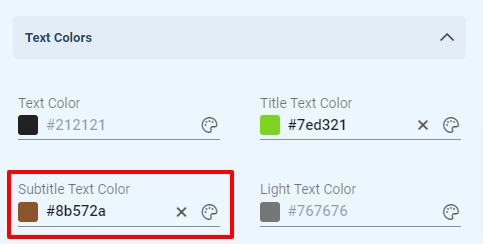
Selected subtitle title text color as applied to the Light style:
Light Text Color - Adjust the text color for description areas in steps.

Selected light text color as applied to the Light style:

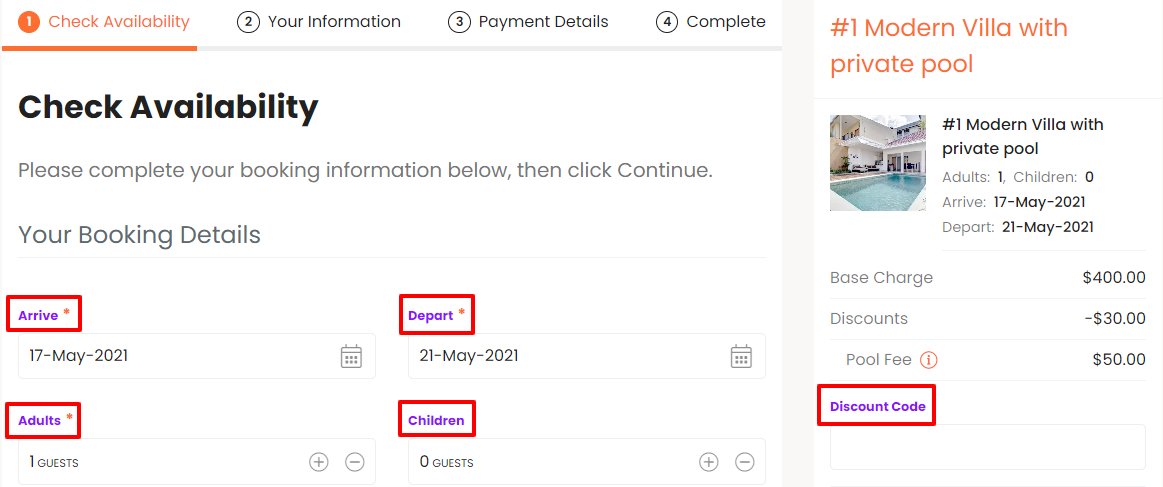
Label Text Color - Adjust the label color for the input fields.
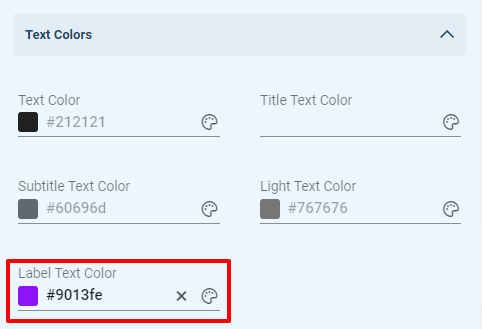
Selected label text color as applied to the Light style:
Tab Bar Colors:
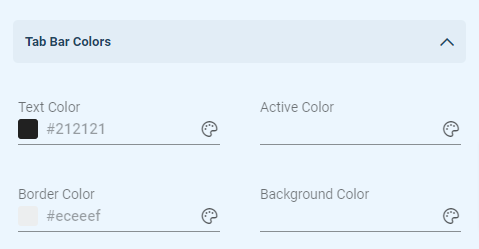
Text Color - Adjust the color of the tab title and step number/icon.
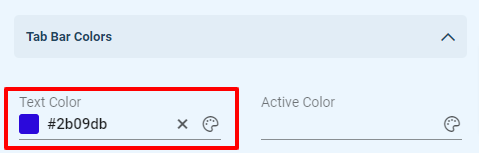
Selected text color as applied to the Light style:
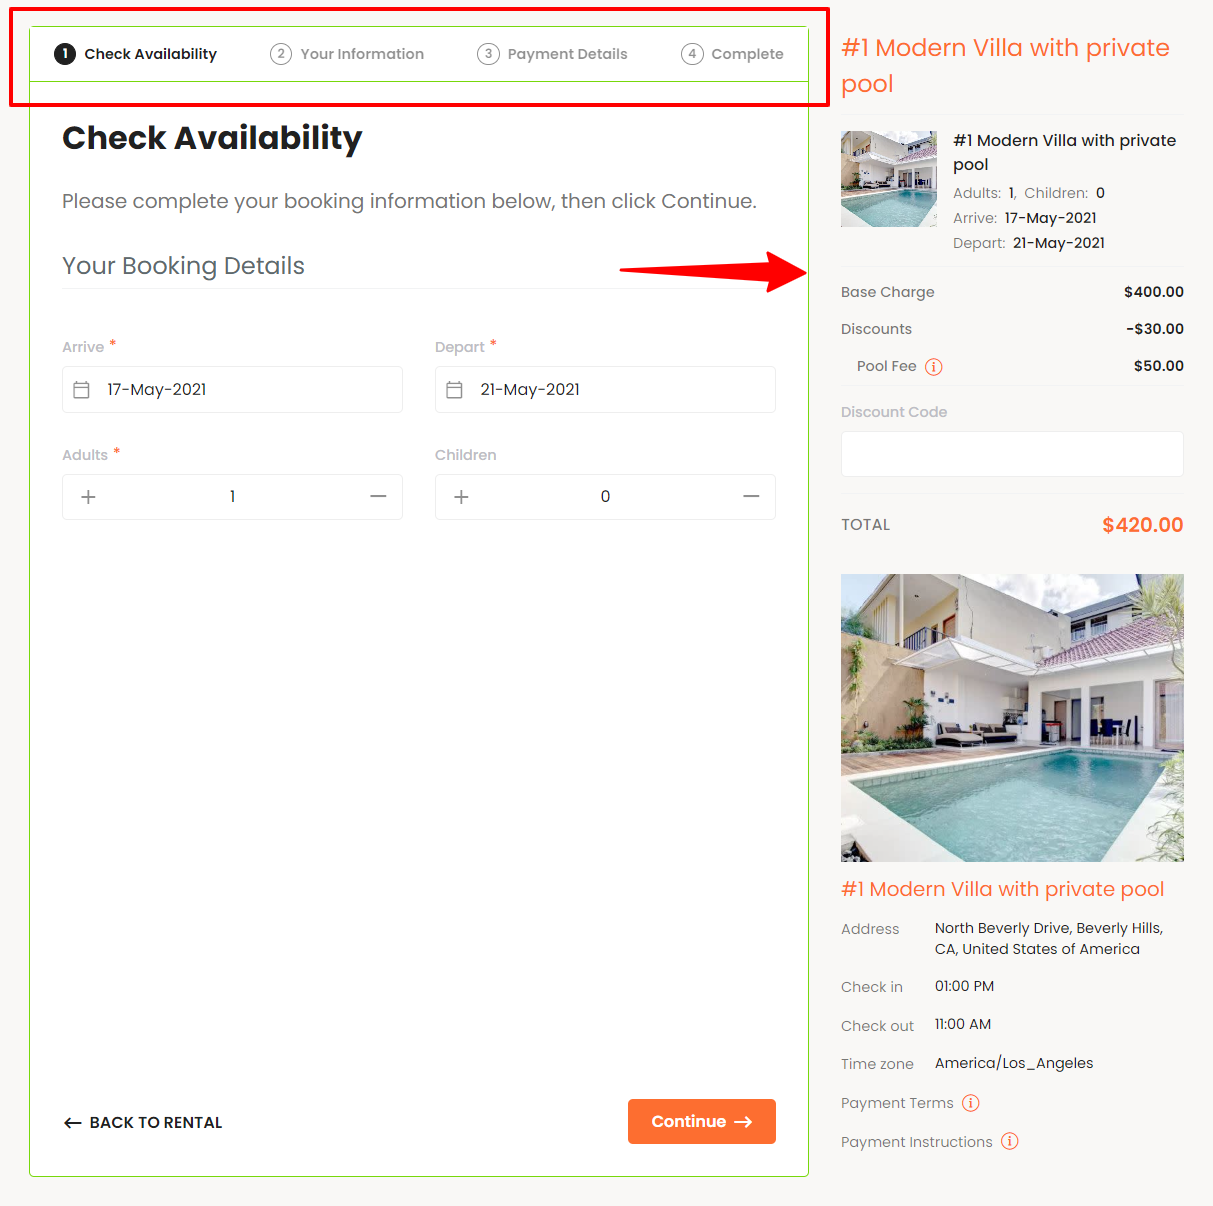
Active Color - Adjust the color of the tab title and step number/icon for the tab that is currently active. It also changes the progress border color of the tabs.

Selected active color as applied to the Light style:

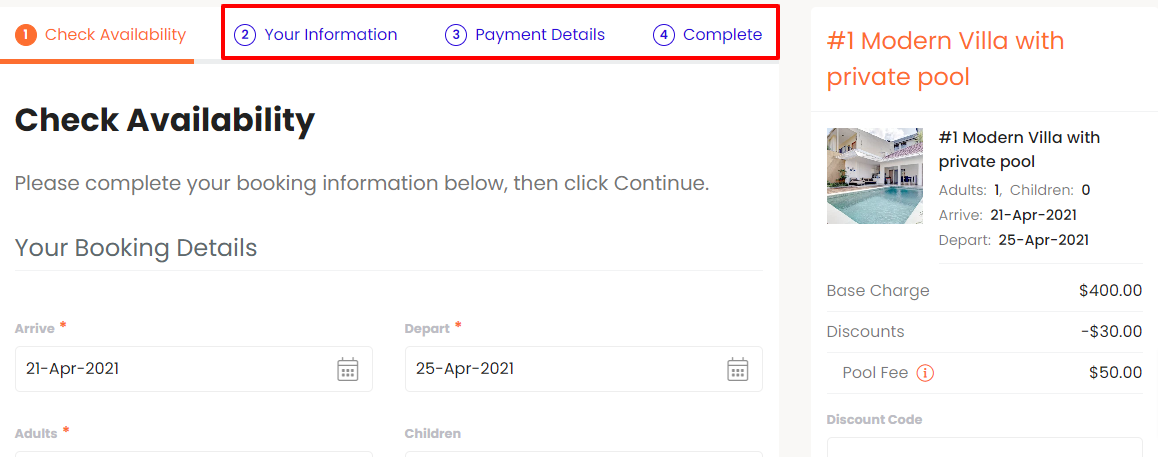
Border Color - Adjust the border color of the tabs.

Selected border color as applied to the Contrast style:
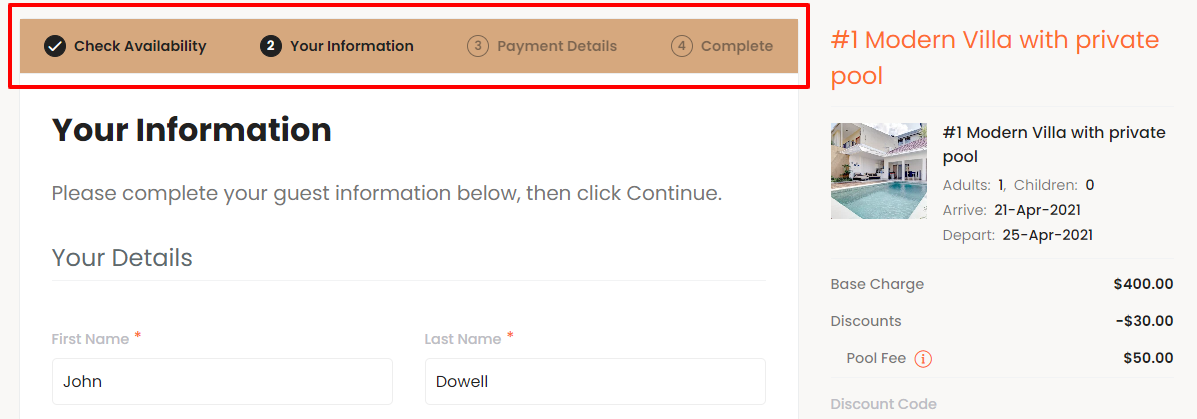
Background Color - Adjust the background color of the tab bar.
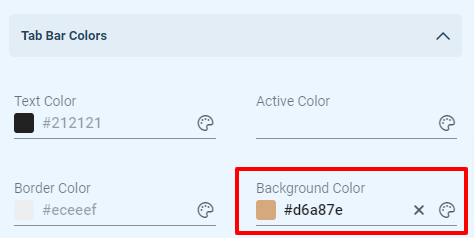
Selected background color as applied to the Contrast style:
Sidebar Colors:

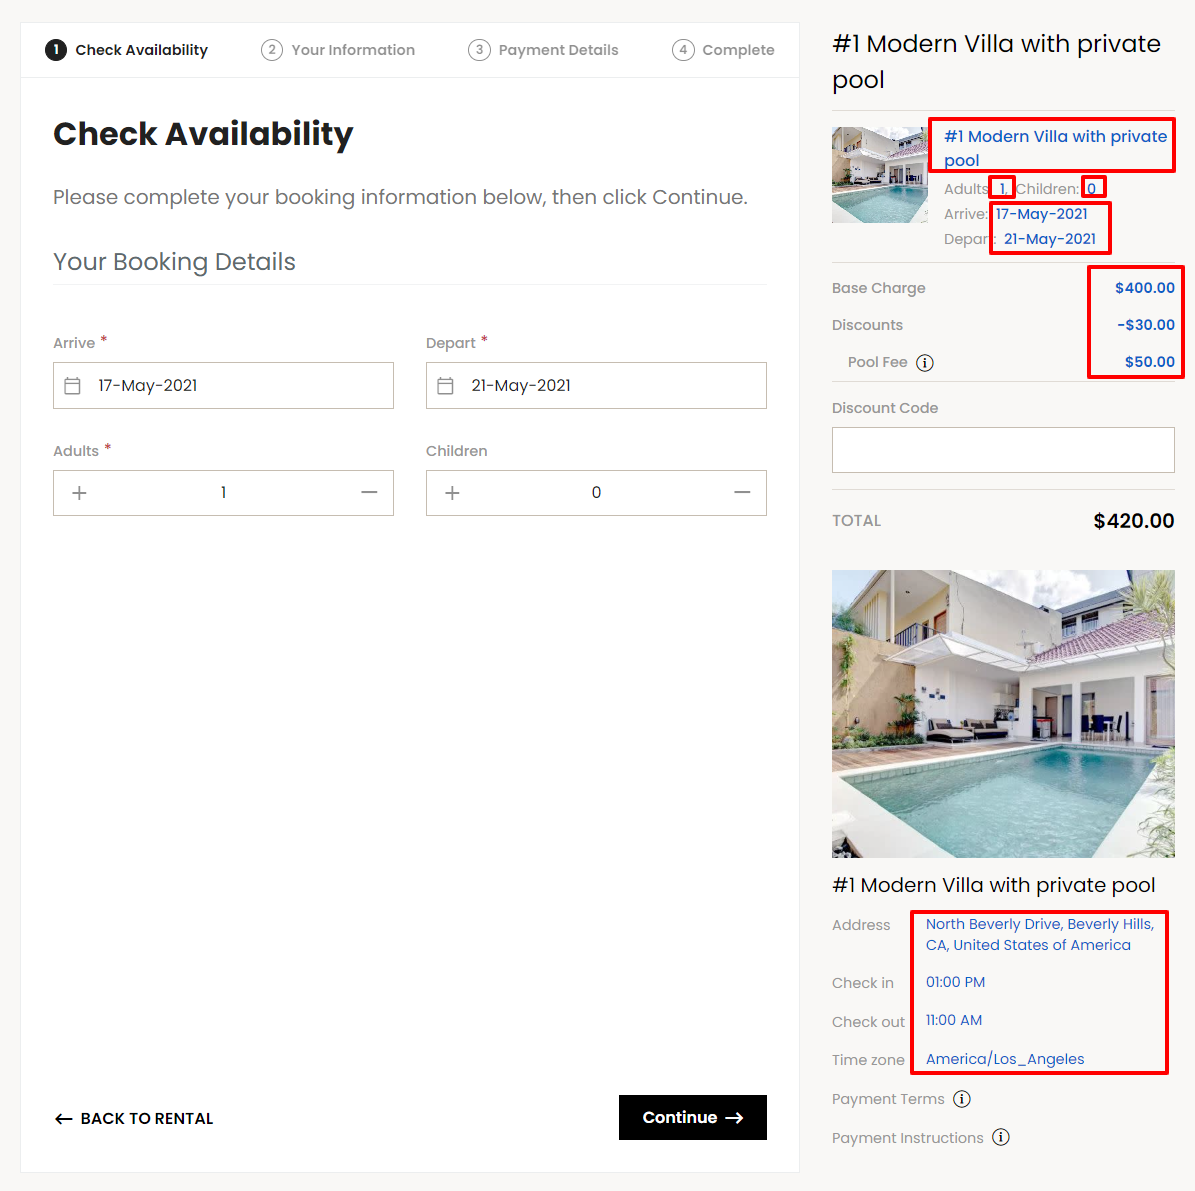
Text Color - Adjust the text color in the sidebar, such as for fee amounts and the rental details.
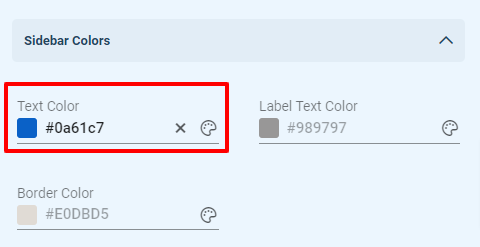
Selected text color as applied to the Default style:
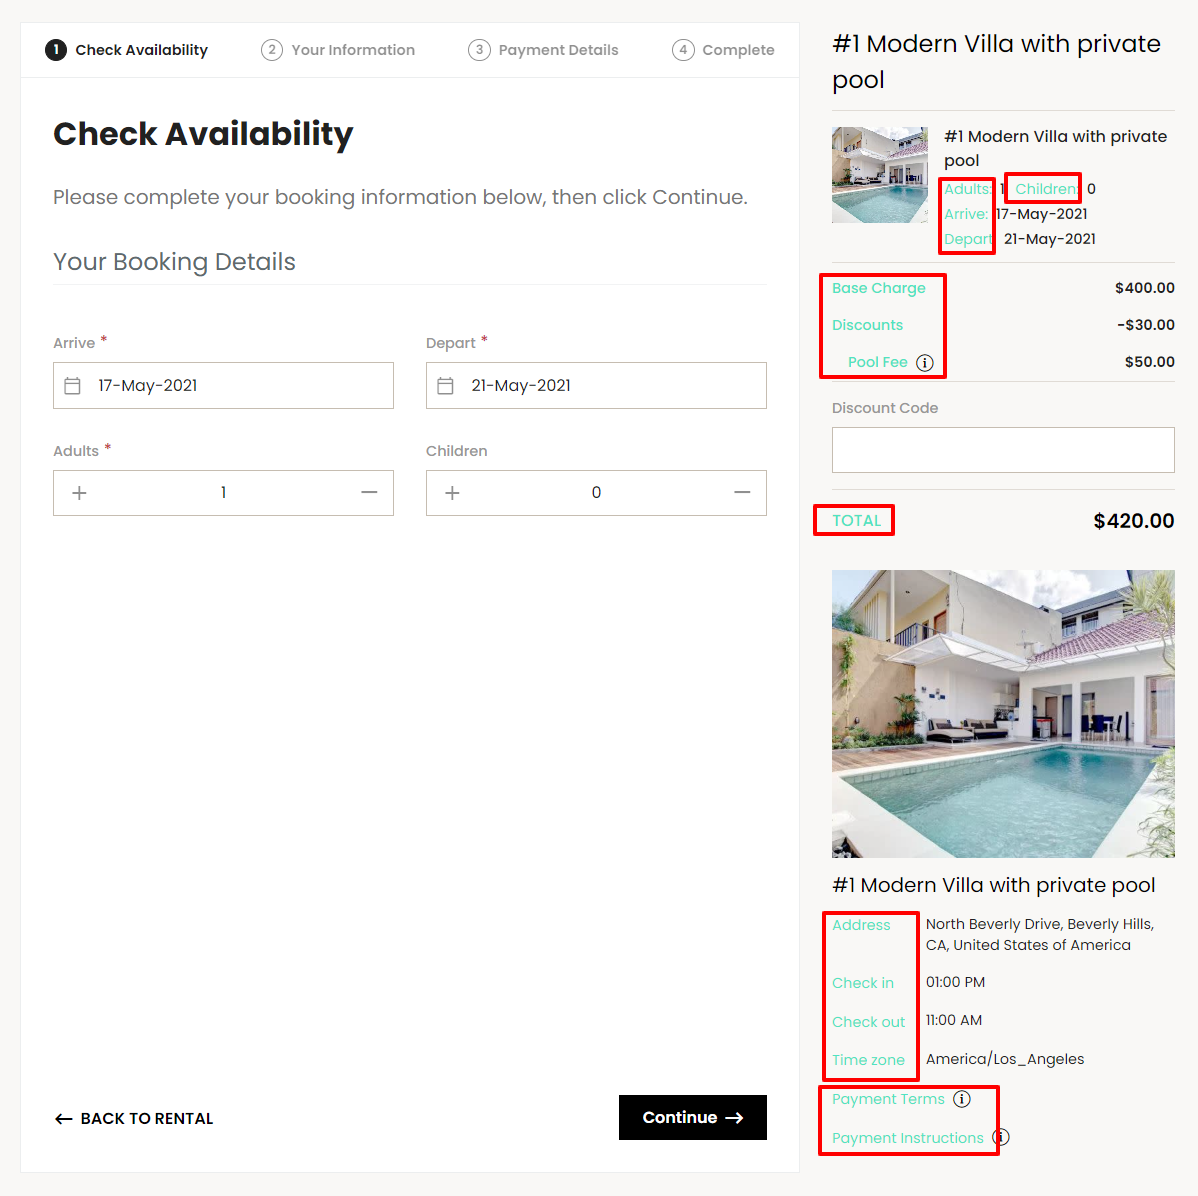
Label Text Color - Adjust the label color in the sidebar, such as those for the fees and rental details.
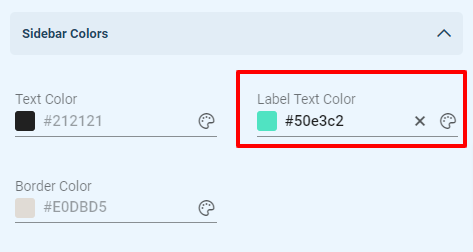
Selected label text color as applied to the Default style:
Border Color - Adjust the color of the borders within the sidebar.
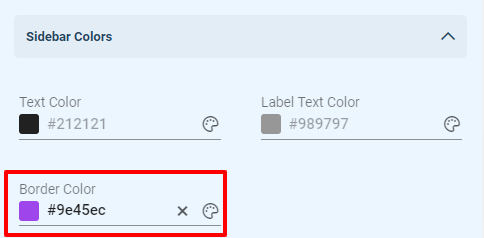
Selected border color as applied to the Default style:
