An important part of a website is the images you use.
Adding images to Webready is easy.

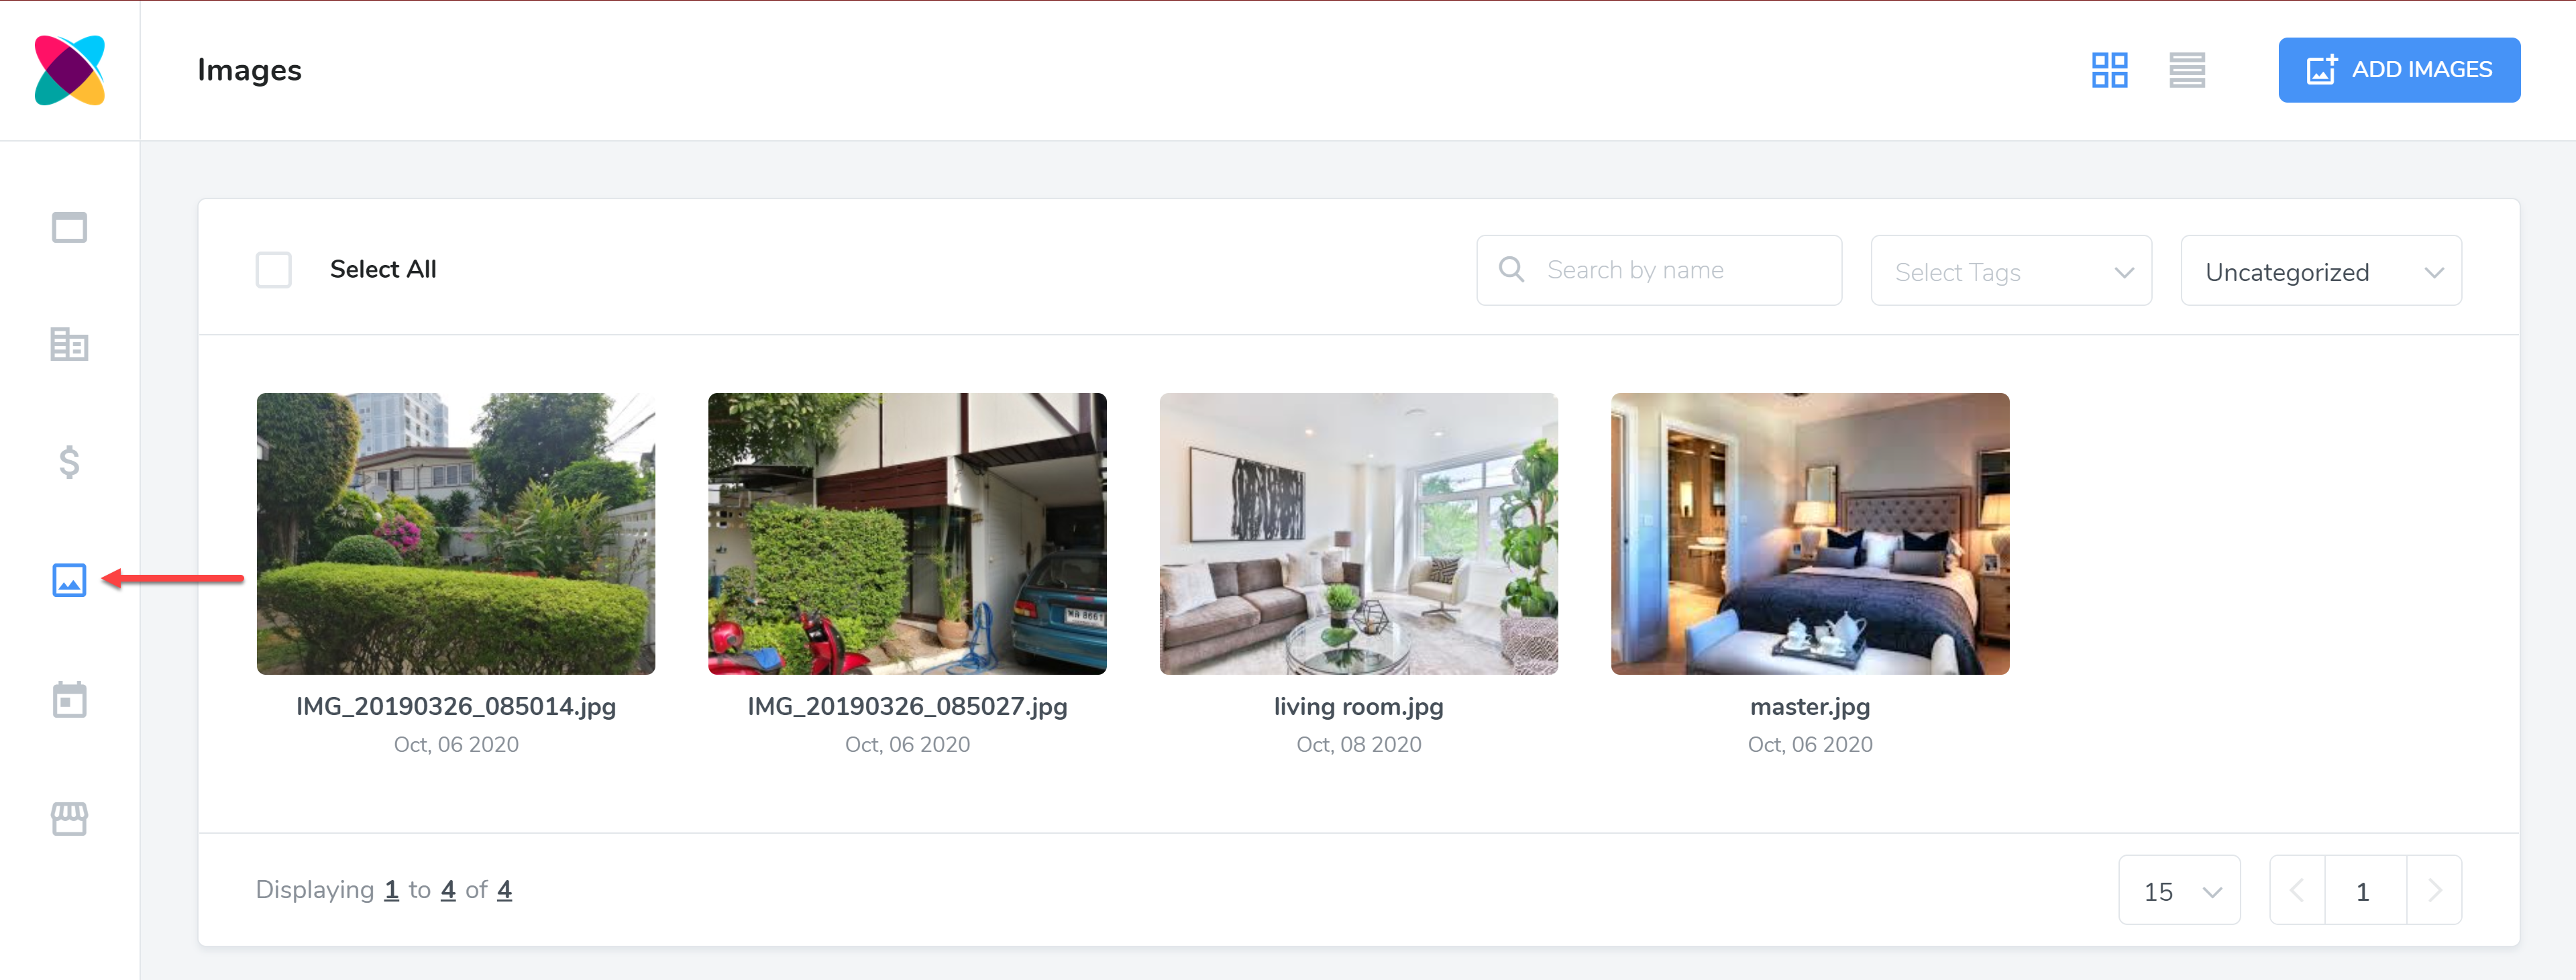
Navigate to your Images module
On the top right, click the Add Images button.
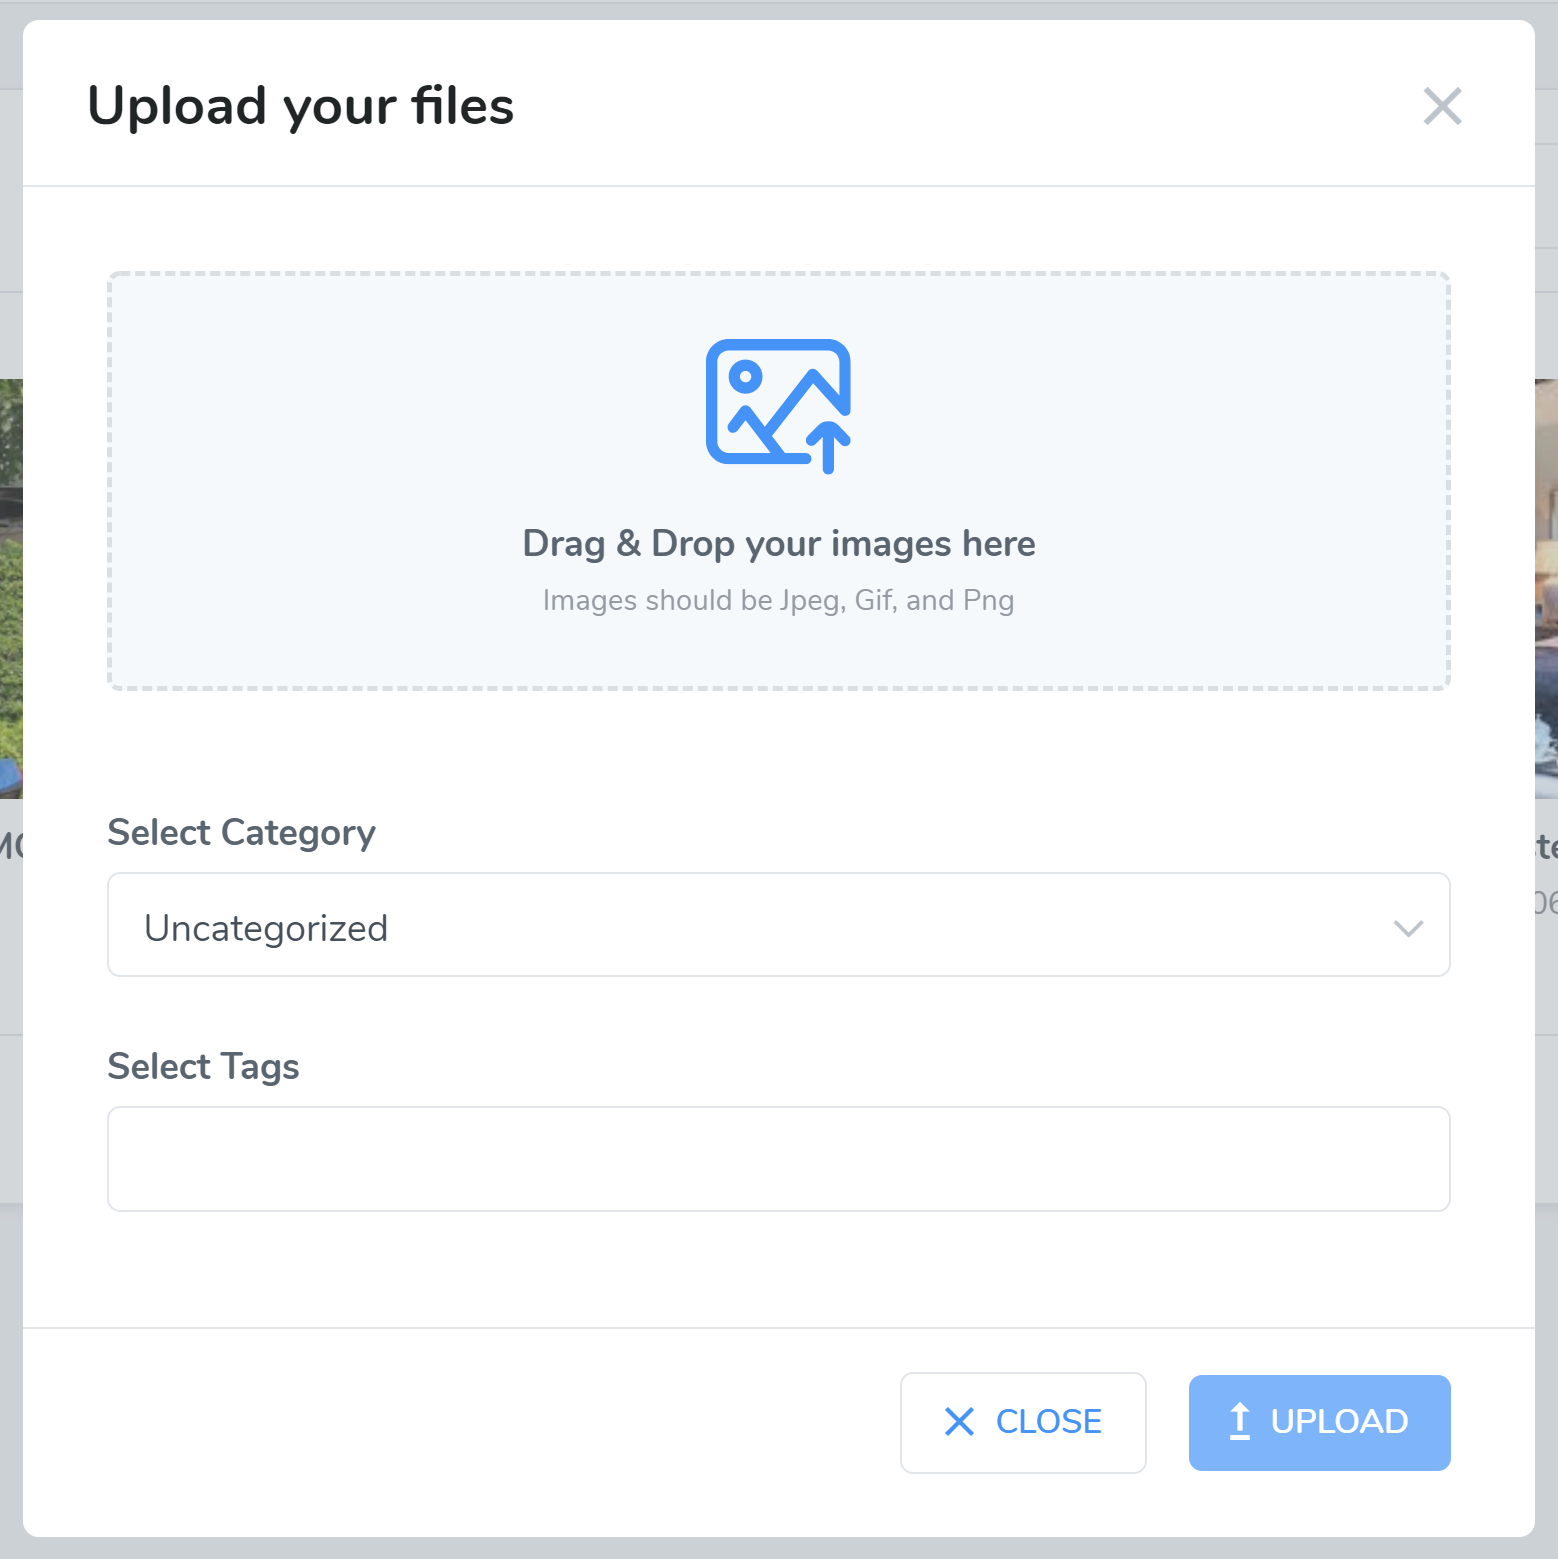
An pop-up will appear for you to upload your images.

You can drag and drop your images or click on the area to open your file explorer to select the images you want to upload.
Next, select the category you want these new images to be placed in. You can organise them into Rental specific categories or Website specific categories.
Tags are very useful for organising your images also. You can add any tags you like.
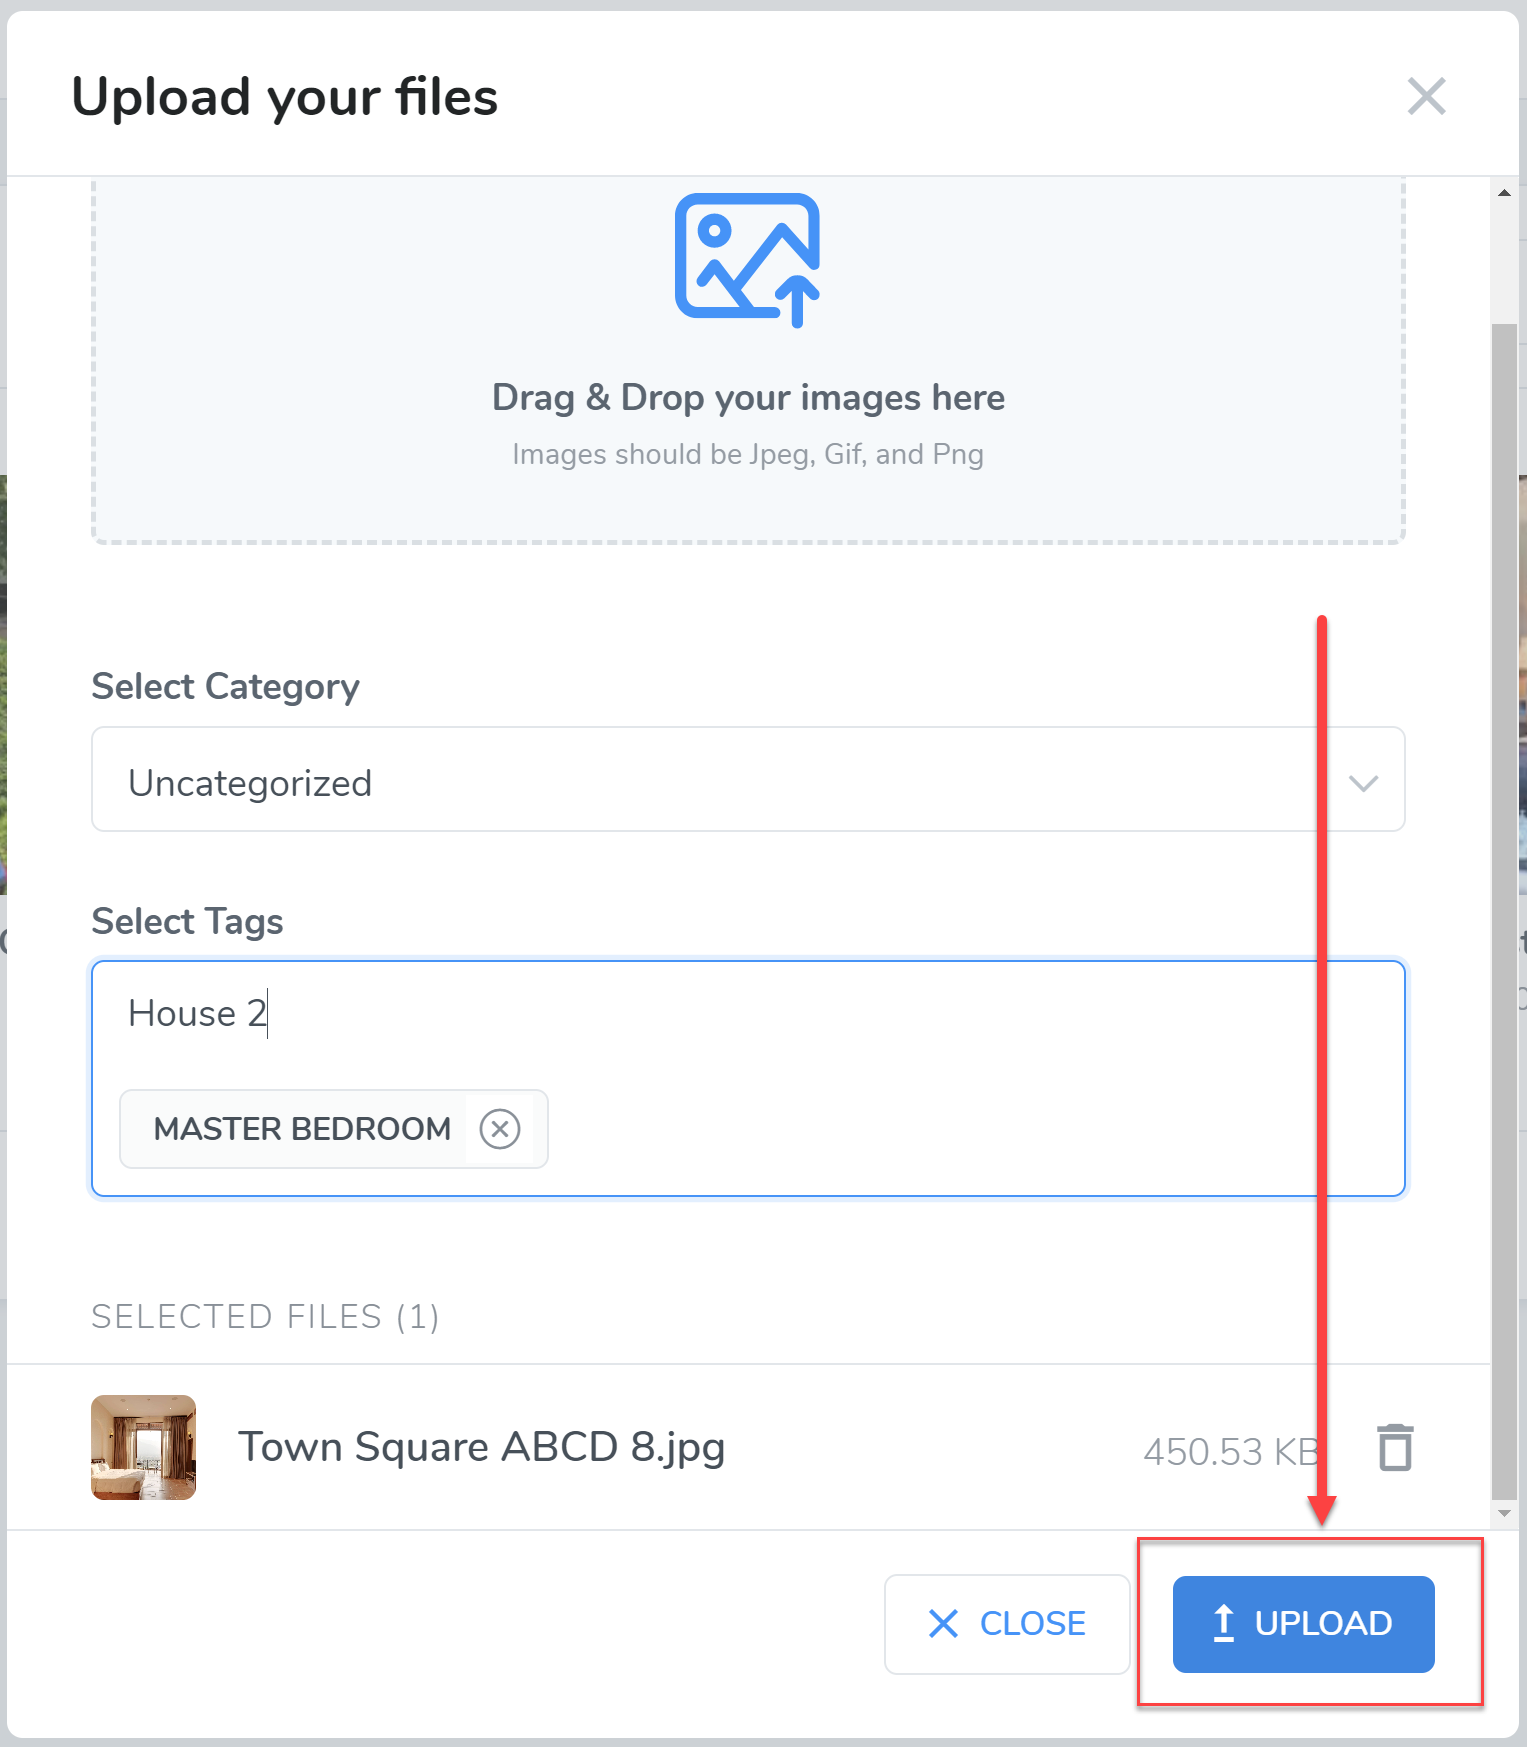
When adding Tags, Type the name of the tag and press enter.

Once you have finished uploading your image(s), selected the category and added your tags. You can then clikc the Upload button.

Depending on the number of images and their file size, this may take some time.
Once your images have been successfully uploaded you will have the choice to upload more or close and finish.

Congratulations, You have successfully uploaded images to your website!
However, since the image size for each image component may differ, the best way to determine the recommended size is by resizing the browser to see what the largest and smallest image size can be used, then upload one with the largest image dimension.
Another recommendation is to optimize the images so the quality is good enough to display well on websites, but not of print quality which would be too high and cause increased bandwidth for your website.
However, since the image size for each image component may differ, the best way to determine the recommended size is by resizing the browser to see what the largest and smallest image size can be used, then upload one with the largest image dimension.
Another recommendation is to have the photographer optimize the images so the quality is good enough to display well on websites, but not of print quality which would be too high and cause increased bandwidth for your website.