When creating your website, you may want to add a password to particular pages or even the entire site so they are cannot be readily accessed. This article shows you how to easily accomplish this.
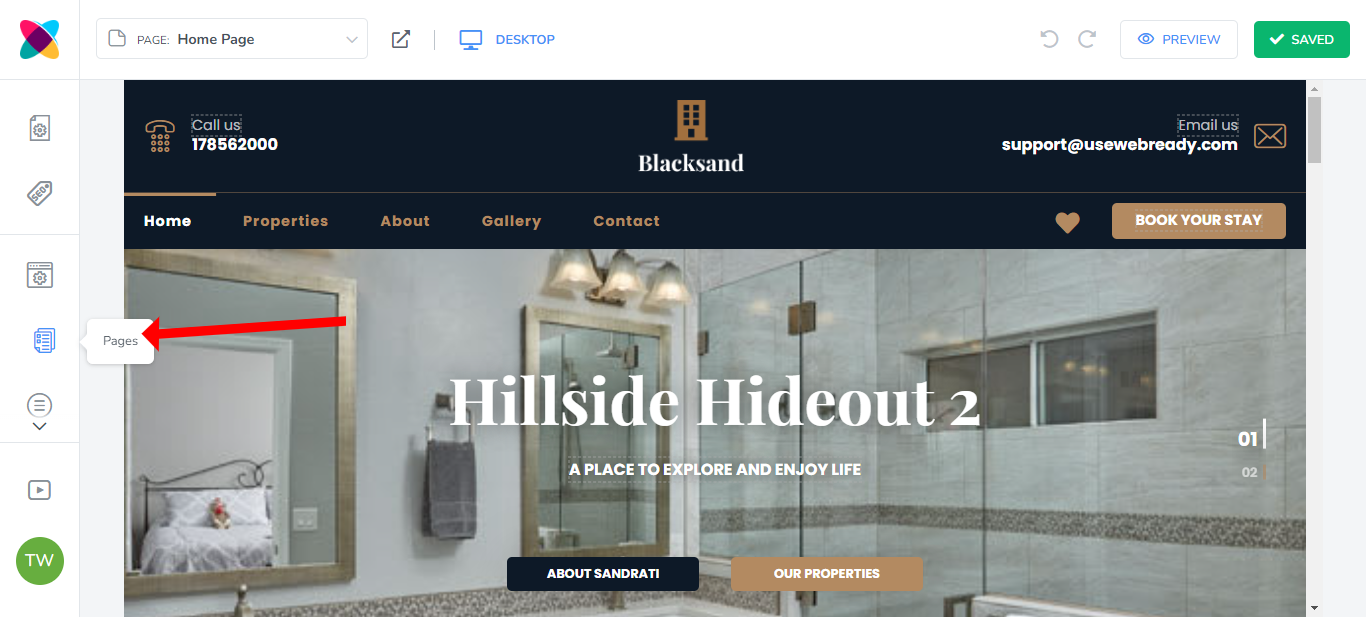
First, you must go to the Editor by clicking on the “Edit” button on your website details page.

Next, click on the “Pages” option in the left navigation panel.
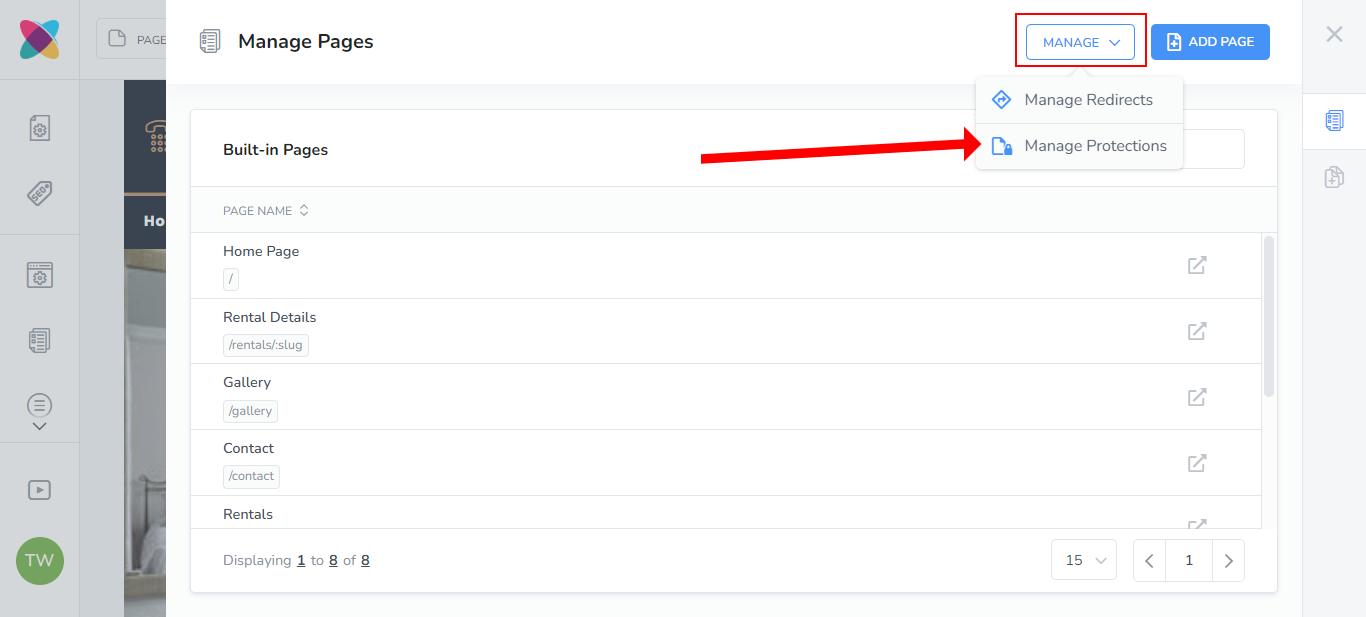
Click on the "Manage" button then "Manage Protections".
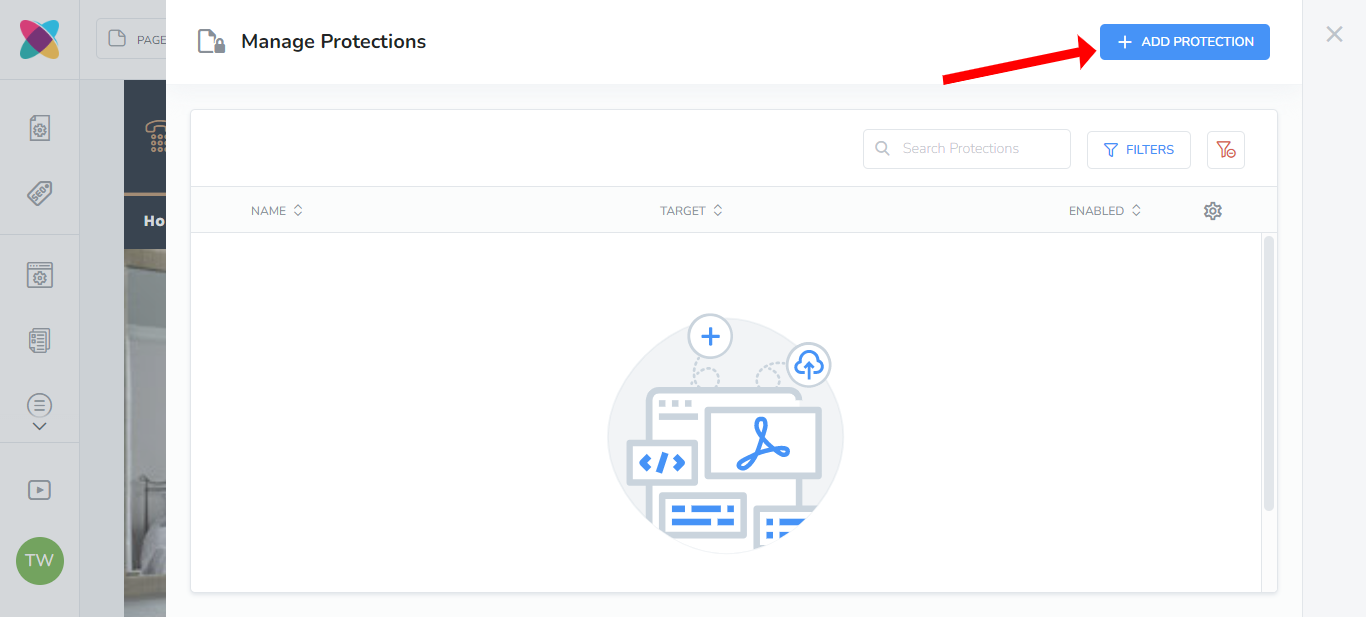
Click on the "Add Protection" button to create a new protected item.
Now, you will need to fill in the required fields:
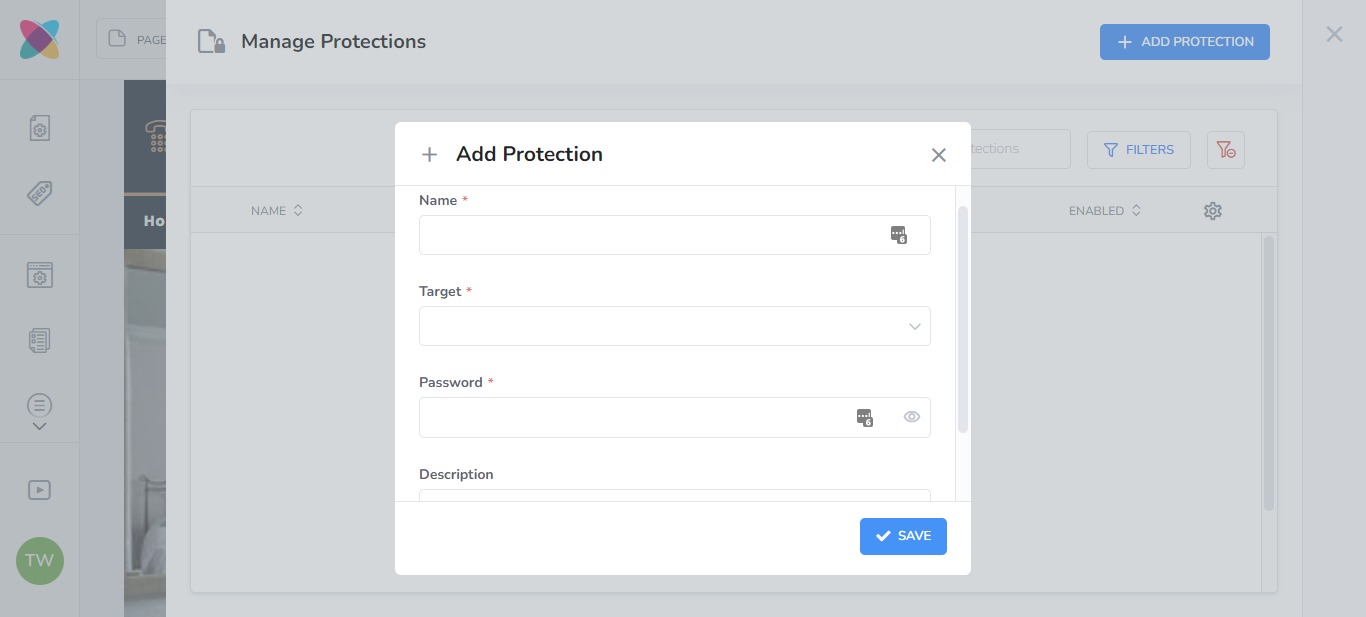
Name: Enter a name for the protected item.
Target: Choose whether you will like to add a password to the entire website, or specific pages.
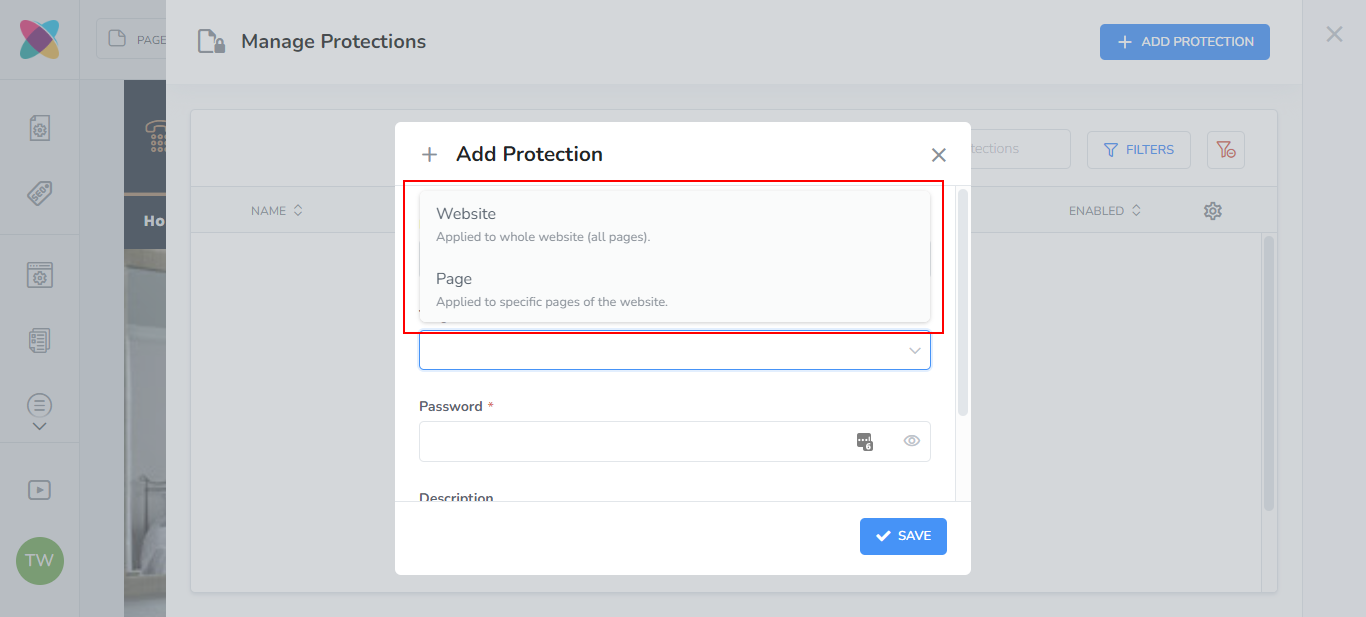
Password: Set the password that will need to be entered to access the website/page(s). You can click on the "show password" icon to view the password that you enter.
Click "Save".
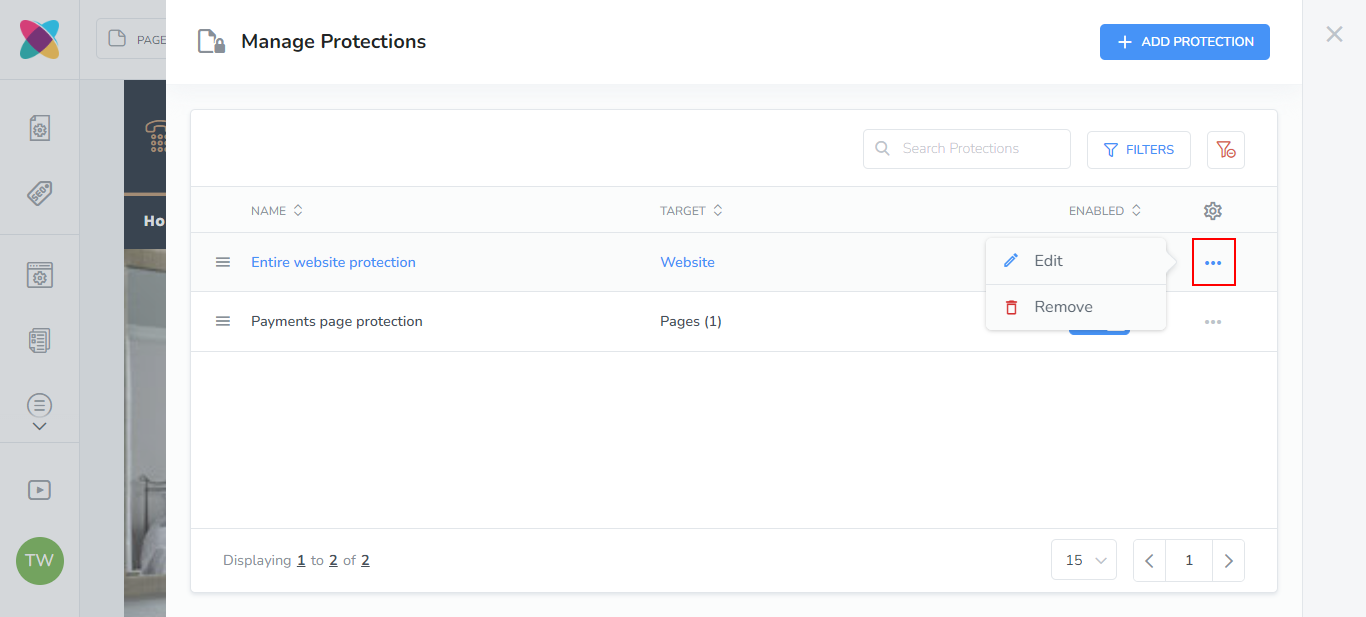
Once you have created Protections, you will be able to click on the options icon and choose to either Edit or Remove them.
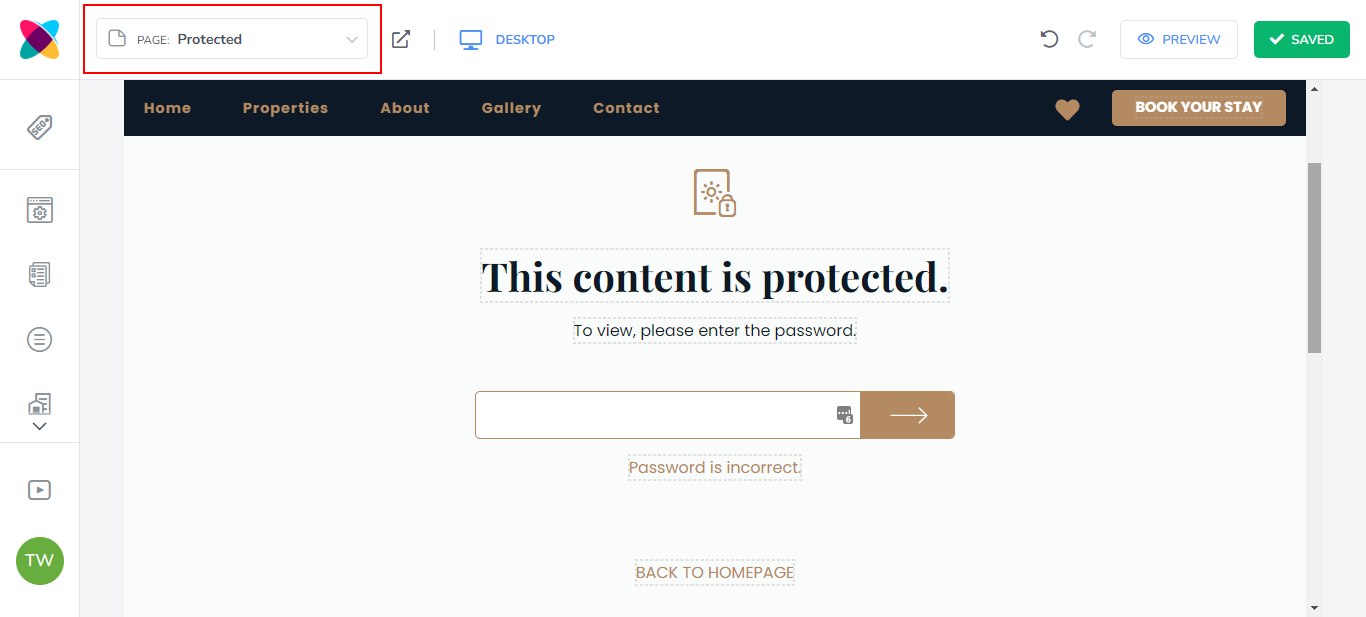
When someone tries to access the protected page(s) or protected website, they will be shown the following "Protected" page by default and will need to enter the password you saved during the setup:

In order to customize the text on this page, select the "Protected" page from the Page selector dropdown list:
Remember to click on the "Save" button in the Editor and Publish/Re-publish your website so the changes can be available on your live website.
That's it!