How to create a Webready website
 Updated
Webready allows you to quickly and easily generate a customized, fully responsive website for your vacation rentals.
Here are the steps to create your own beautifully designed website.
Create a website
After signing in you will be taken to the Dashboard page of the Websites Module, where you will see a button on the top right.

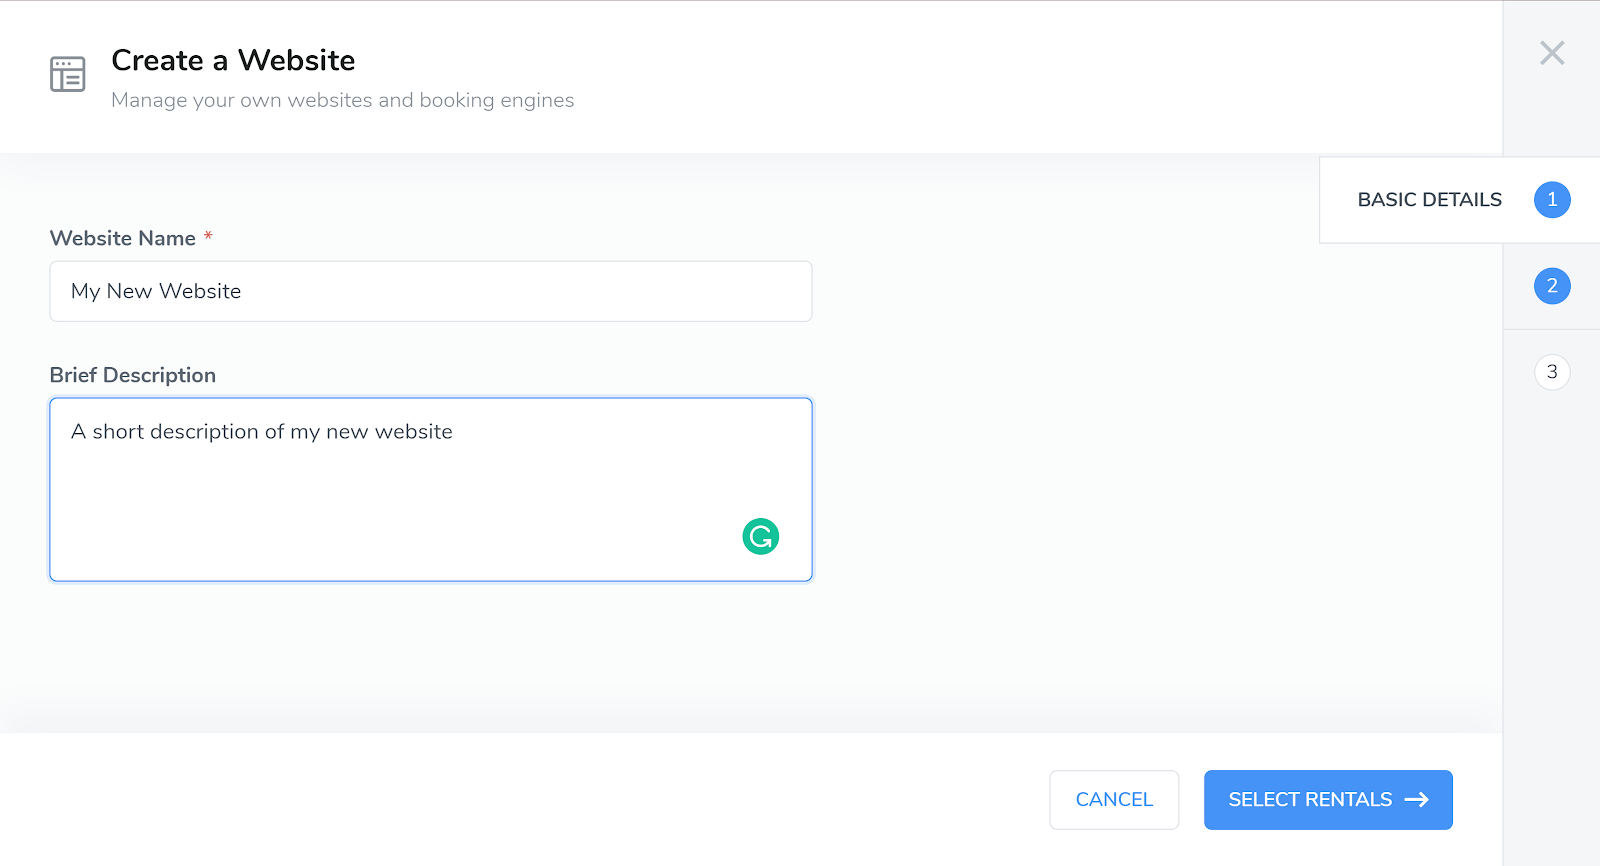
Fill in the Basic Details
You will then need to give the website a name. A description can also be entered.
Select the Rental(s)
The next step is to select one or more rentals to include on your website.
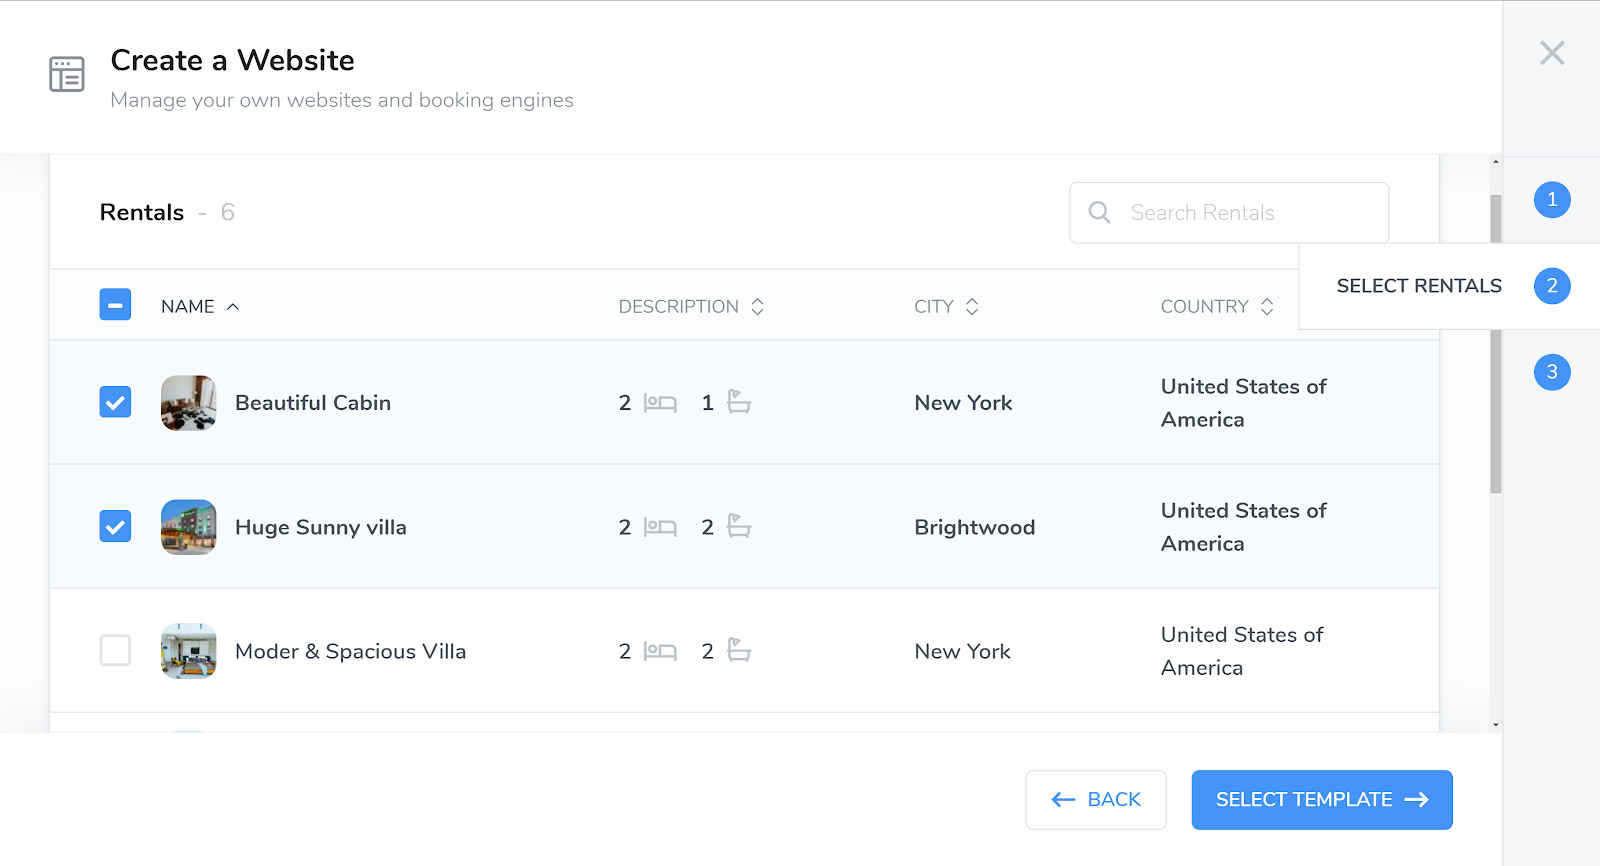
If your website will only feature 1 rental then the “Single Rental” type will be used, however, if your website will feature more than one rental, then the “Multiple Rentals” site layout will be used.
Once a website is created, the website type (single or multi-rental) cannot be changed.
If you created a single rental website but wish to have a multi-rental website later, you will need to create a new website and add the multiple rentals to that website. You can unpublish the single rental website if it will no longer be needed.
Similarly, deleting rentals from a multi-rental website until it only has 1 rental, will not change the website type to a single rental website.
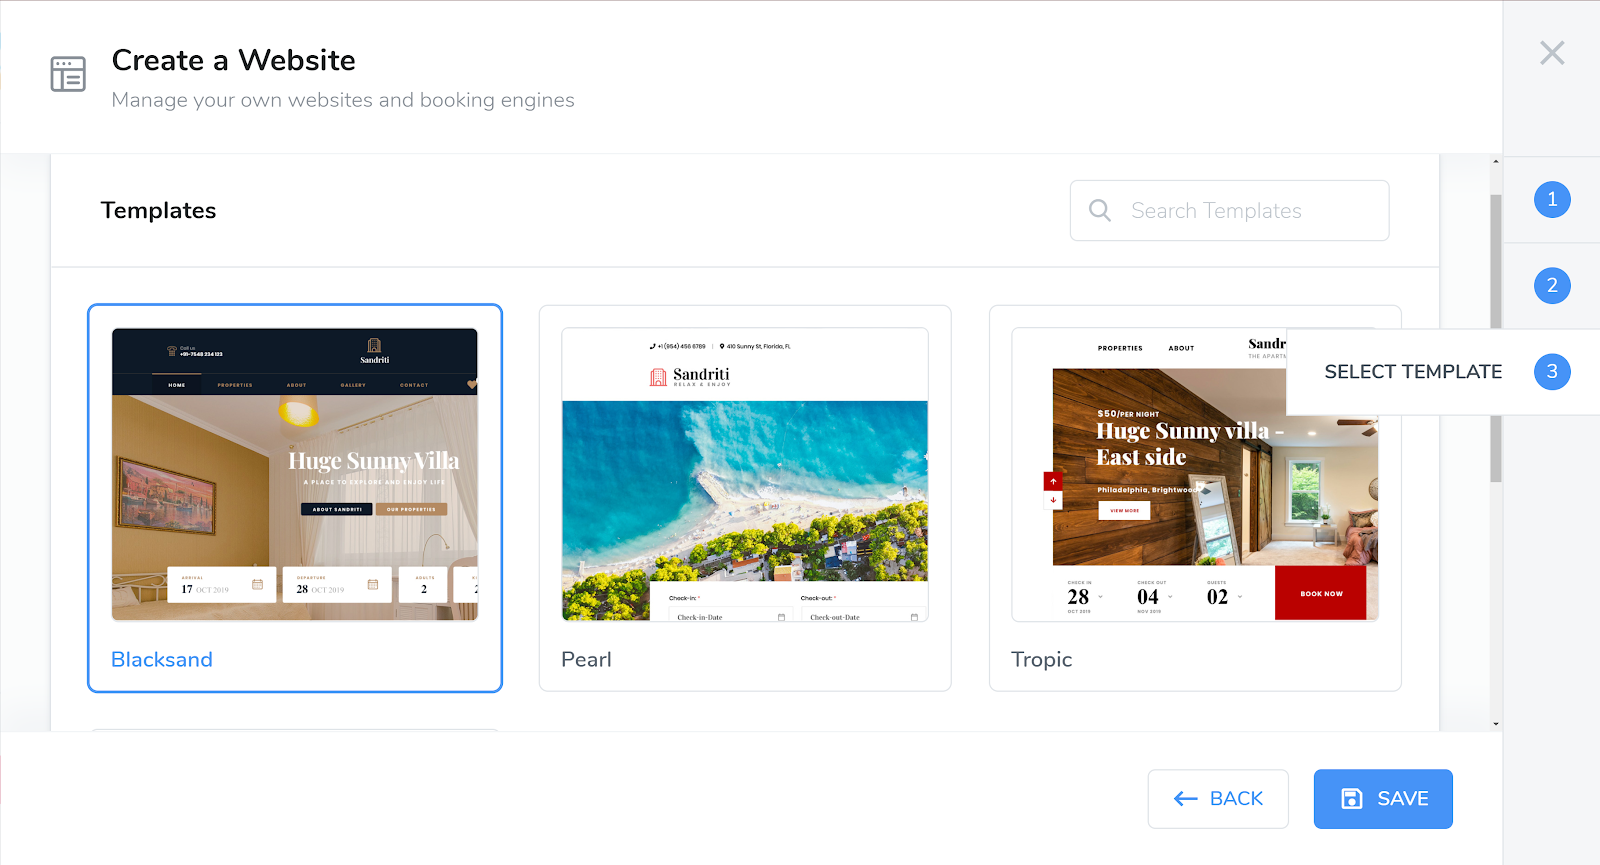
Select a Template
Now, you will have an option of templates to choose from. These can be changed anytime.
Save
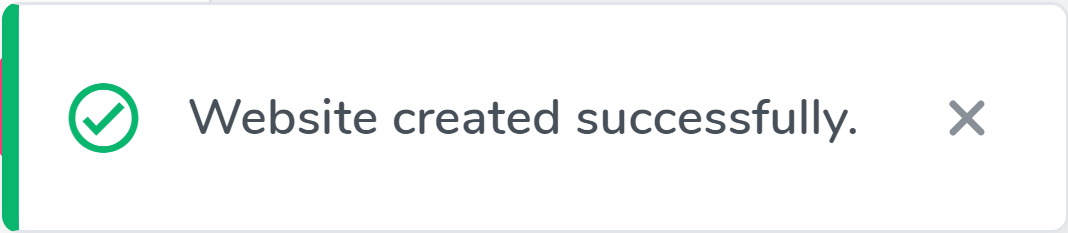
The most important step is to save your website. You can find the save button on the bottom right.

Once you have saved your website a success message should appear on the bottom left of your screen.
You will now see the website Dashboard. In the dashboard you will be able to perform many different actions.
This will allow you to perform different actions on your website, such as to preview your website, rename, duplicate, change template and delete.
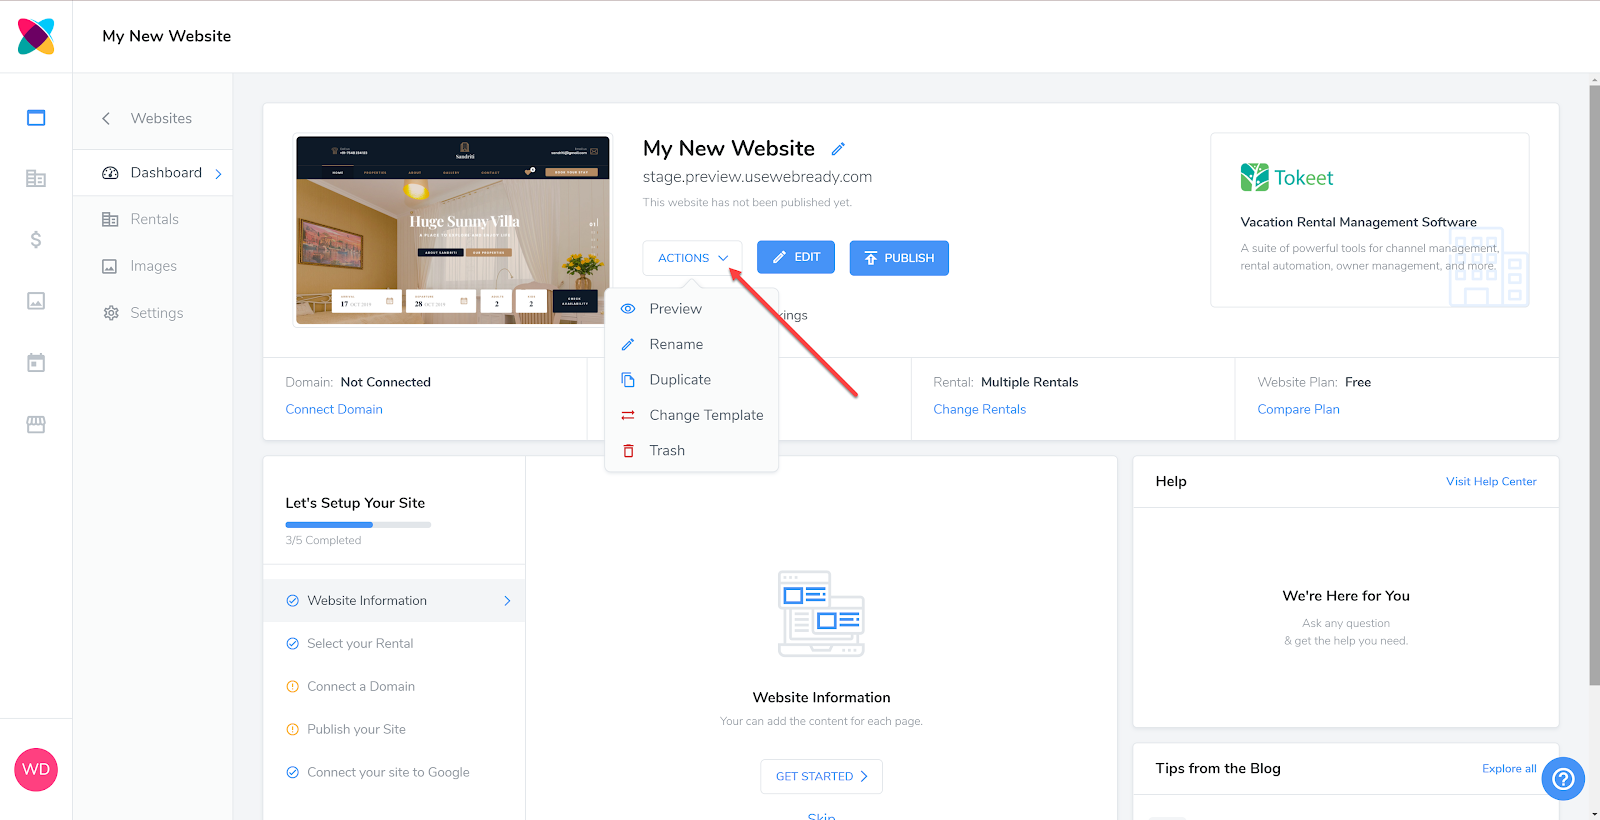
You will notice that the setup of the website at this point is only 3/5 complete. The next step is to Connect a Domain to the website.
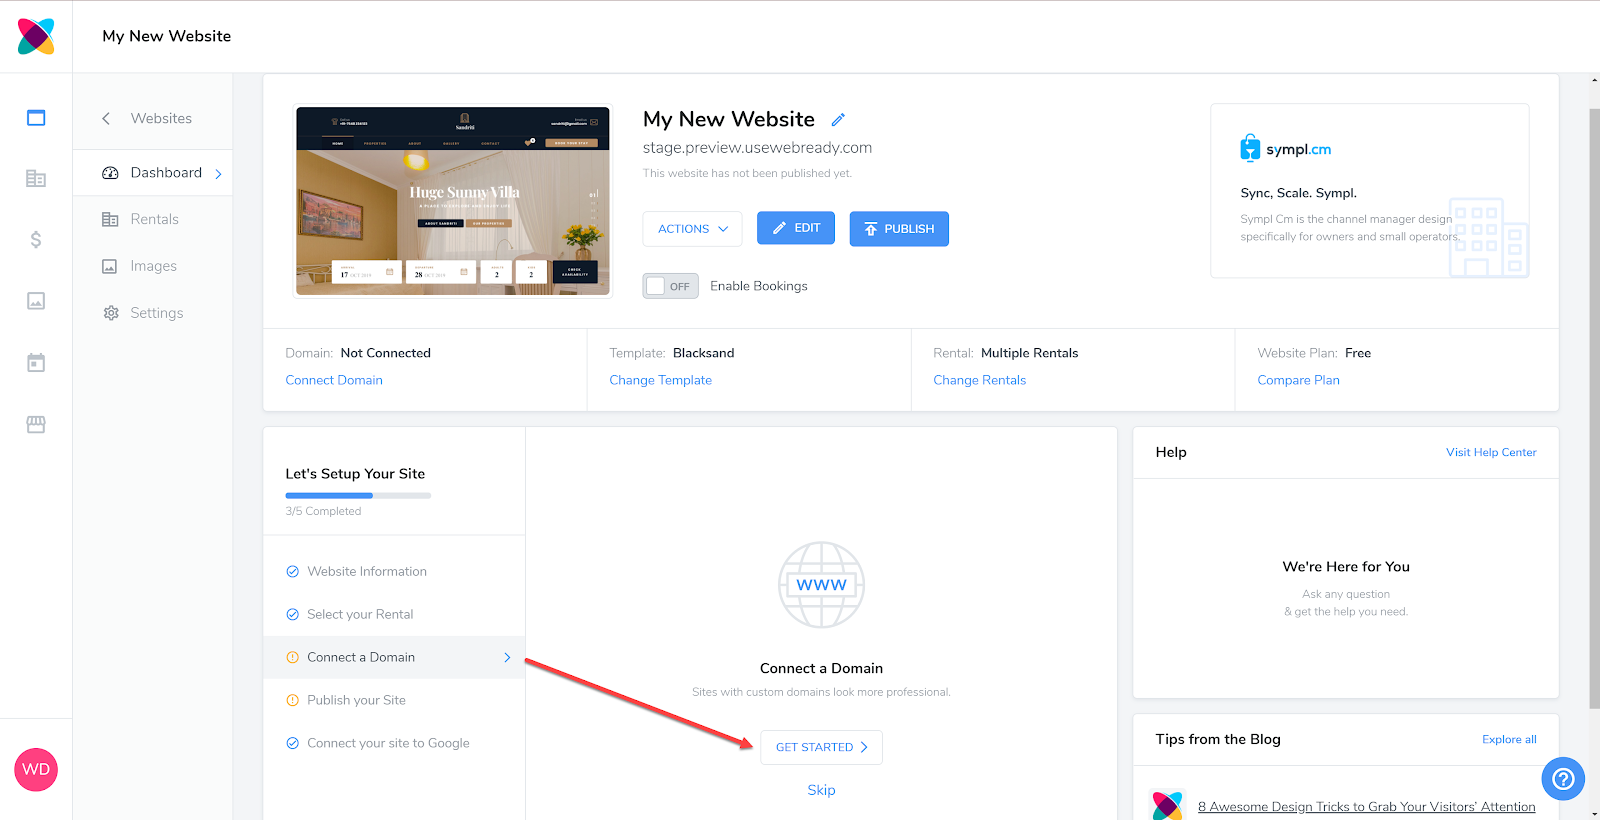
Add a Domain
Your domain is the url that your potential guests will navigate to online to view your website.
To complete the setup of your website, you must connect it to a domain. You can add a domain or buy a domain.
Add a Domain:
You will have 2 options for adding a domain. You can either choose a Free Webready Domain or use a Custom Domain.
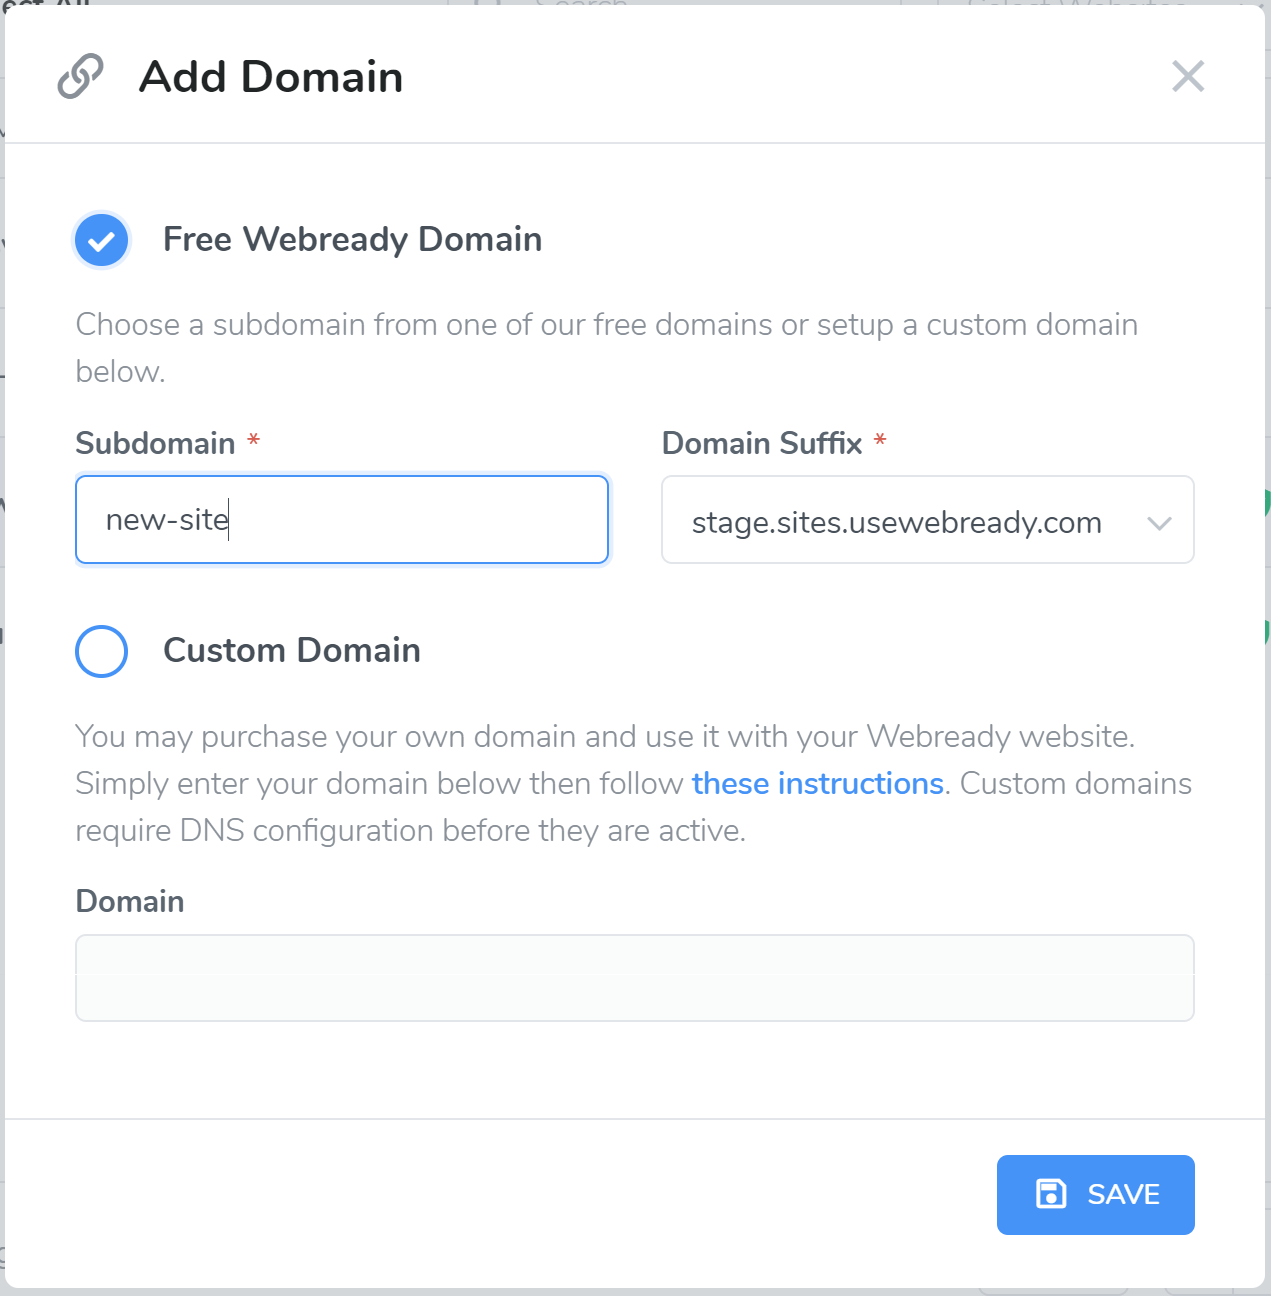
The Webready domain has built-in SSL and allows you to enter a subdomain of your choosing that will be used along with your selected domain suffix.
Alternatively, you may wish to use a custom domain that you have purchased. Simply enter the domain then follow the instructions in the link provided to ensure that is properly configured.
Secure and Activate Domain (not needed for free domains)
If you would like for your website to be secure (https:// ) you can simply use the Request SSL option and the SSL Certificate will be issued through Webready.
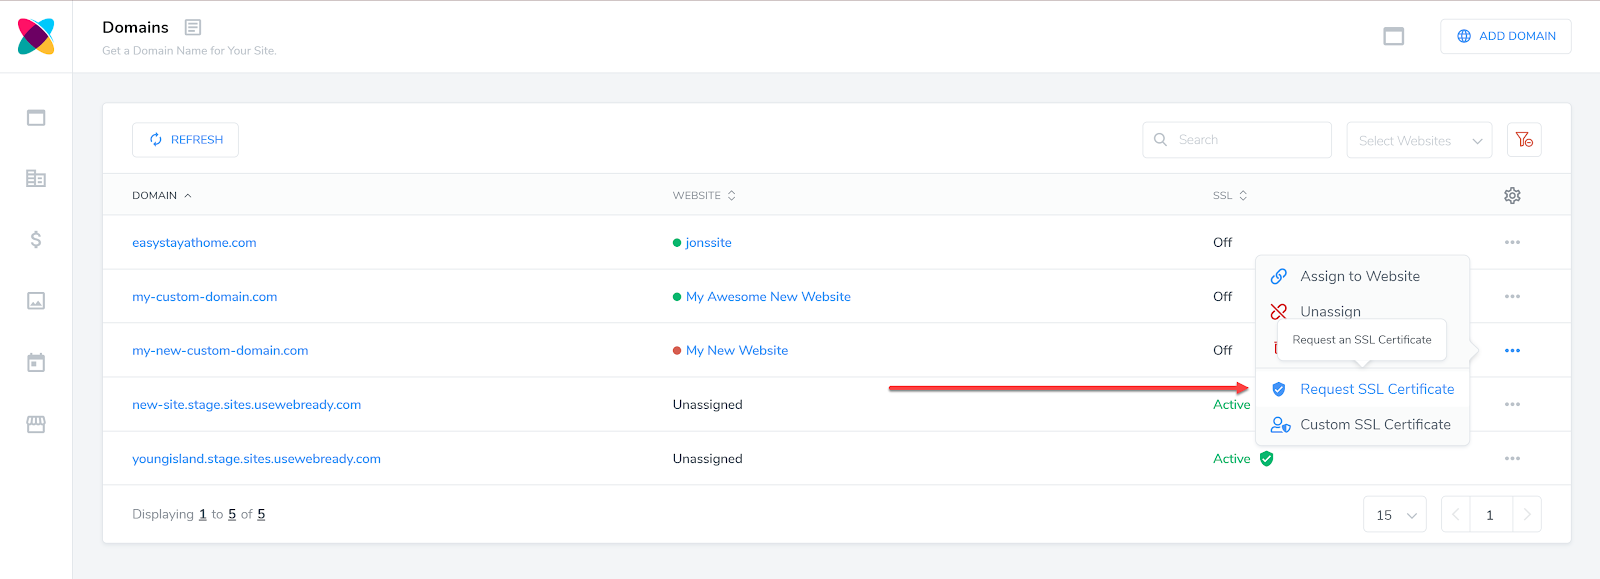
Request SSL Certificate:

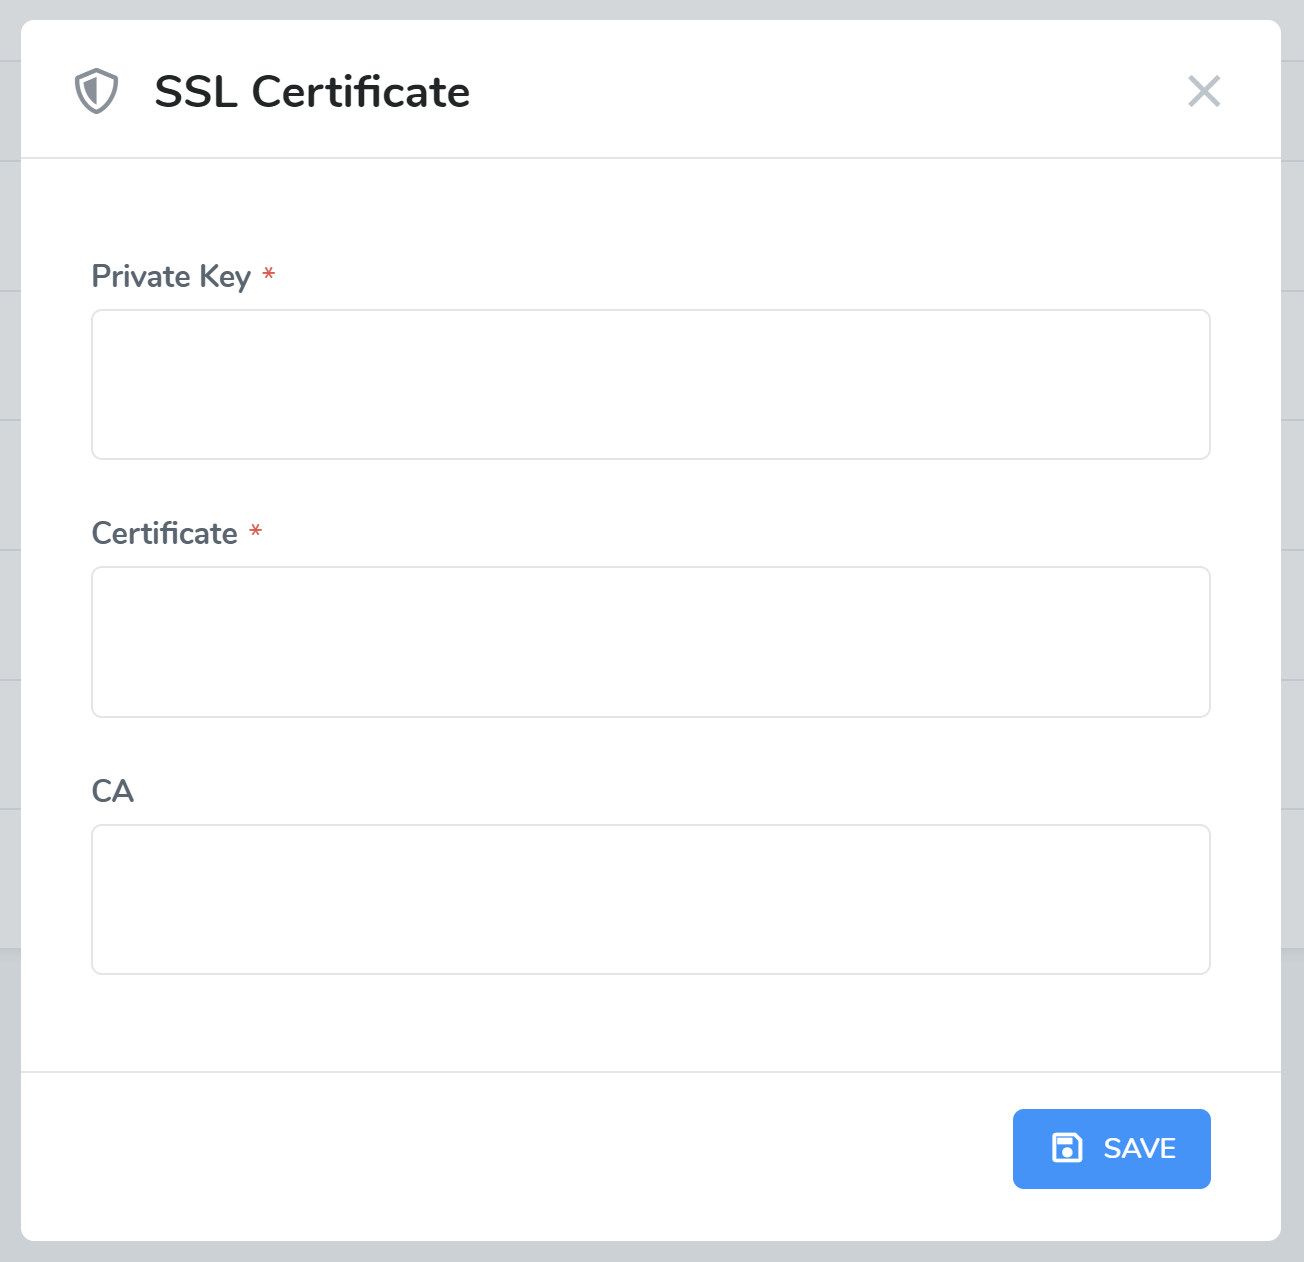
There is also a “Custom SSL Certificate” option if you will like to use a different SSL provider.
Custom SSL Certificate:
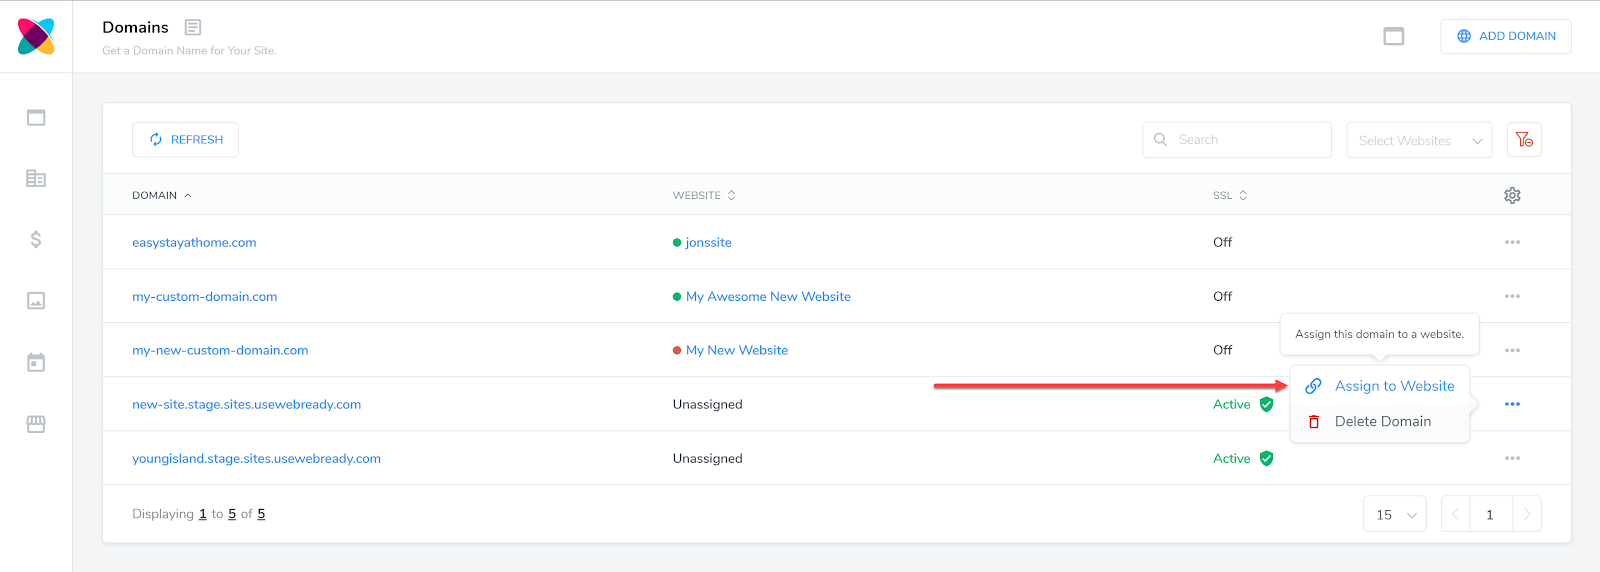
Assign website to Domain
Once you have an active domain, you can now assign your website to it:
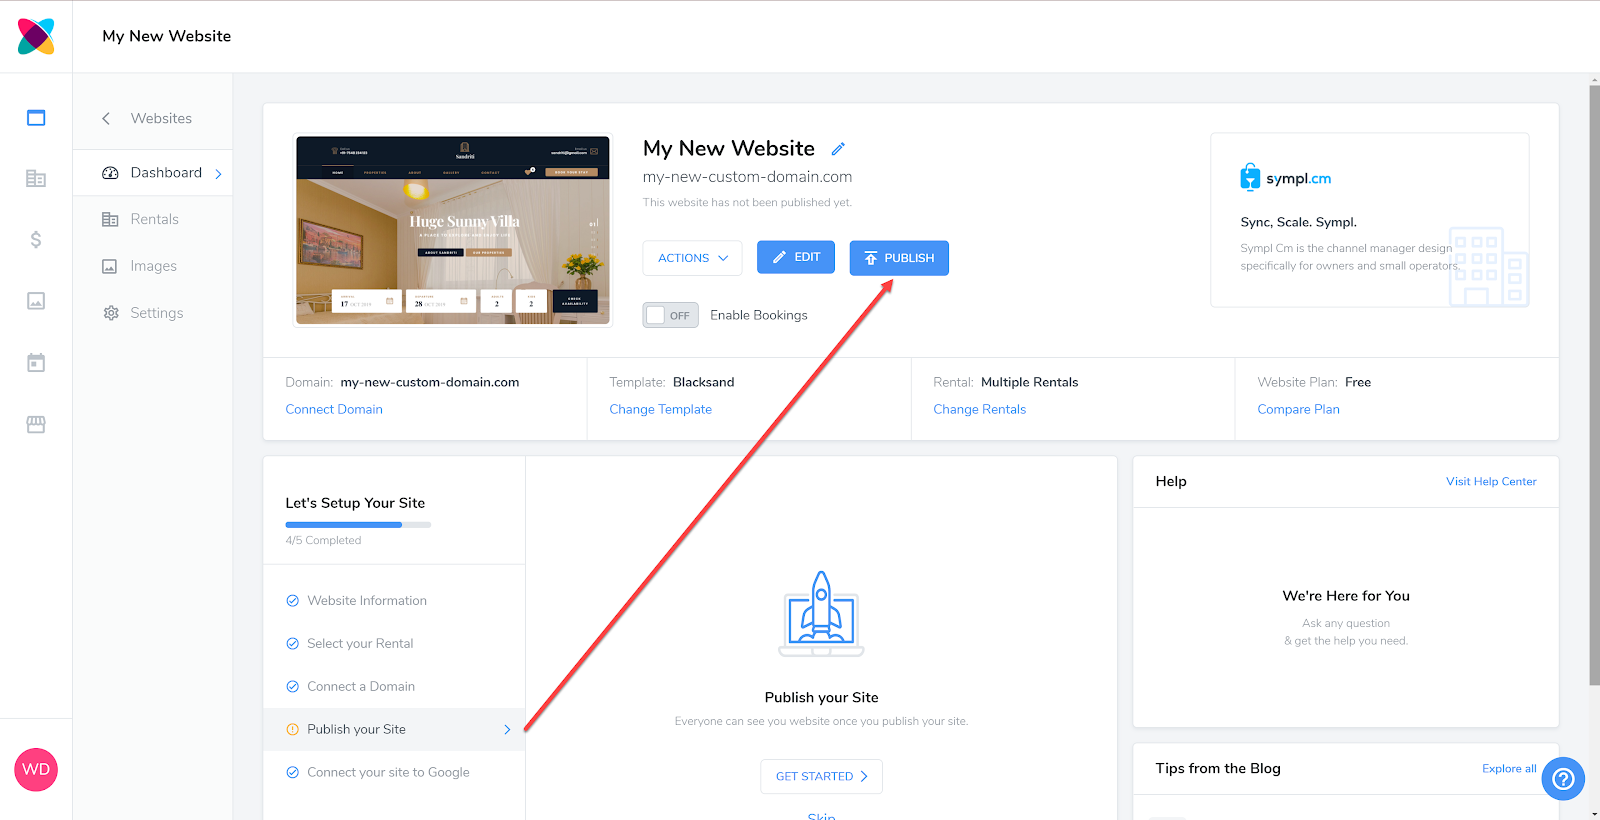
Publish your site
The final step is to publish your website. Navigate back to your Websites module > select website > Dashboard and click the Publish button
That’s it! You have created your own vacation rental website.
Webready allows you to customize your website further through the Edit mode. You will be able to easily change text, colours, add social media links, rearrange sections, adjust your site menu and preview it in different device modes.